Multilanguage
To make your bot multilingual and optimize its performance, you need to access the advanced settings of your specific bot. Follow these steps:
1. How to access the settings
Navigate to "Bots": In the left-hand sidebar menu, click on the "Bots" module under the "Modules" section.
Select your Bot: In the list of your bots, locate the bot you want to configure.
Click Edit
Open the advanced tab: A configuration window will appear. In the left-hand menu of this window, you will find the following tab Additional Treatments
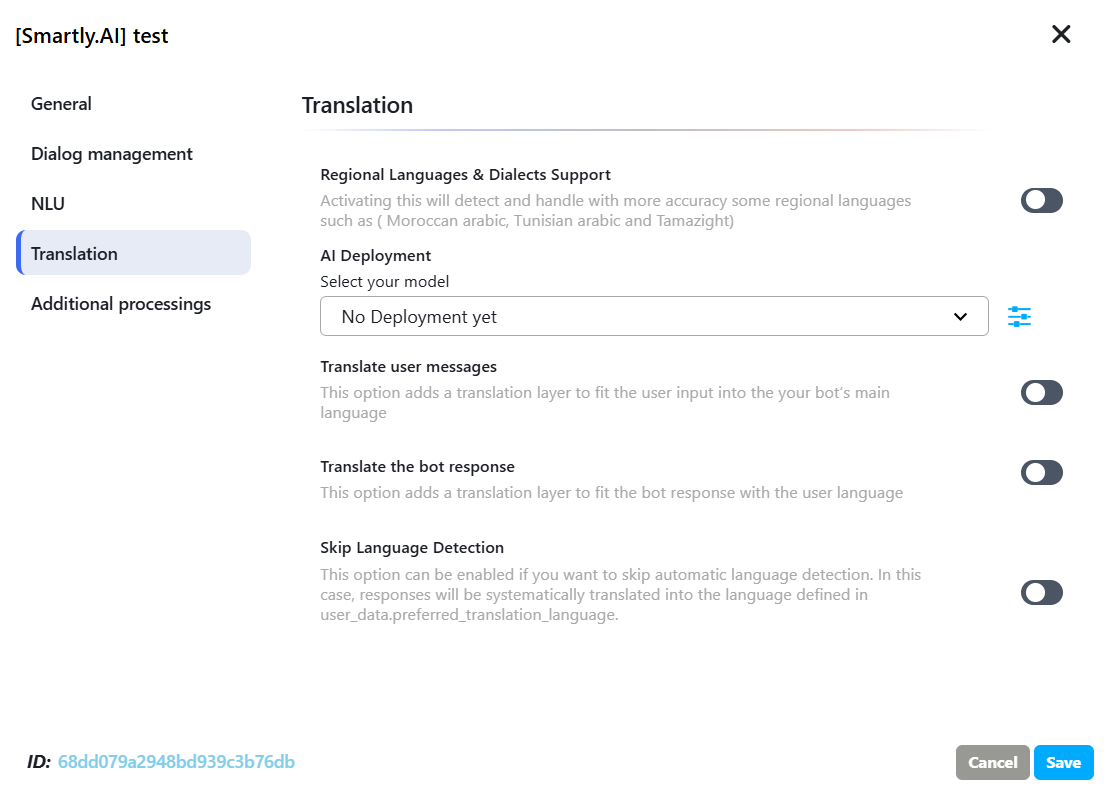
Open the "Translation" tab: In the configuration window that opens, click on the Translation tab in the left menu (located just below NLU).
Note: If your bot is multilingual, you will see sub-tabs for each language (e.g., English, French).
2. Dialects and Custom Dictionary
A. Regional Languages & Dialect Support (Smartly LLM)
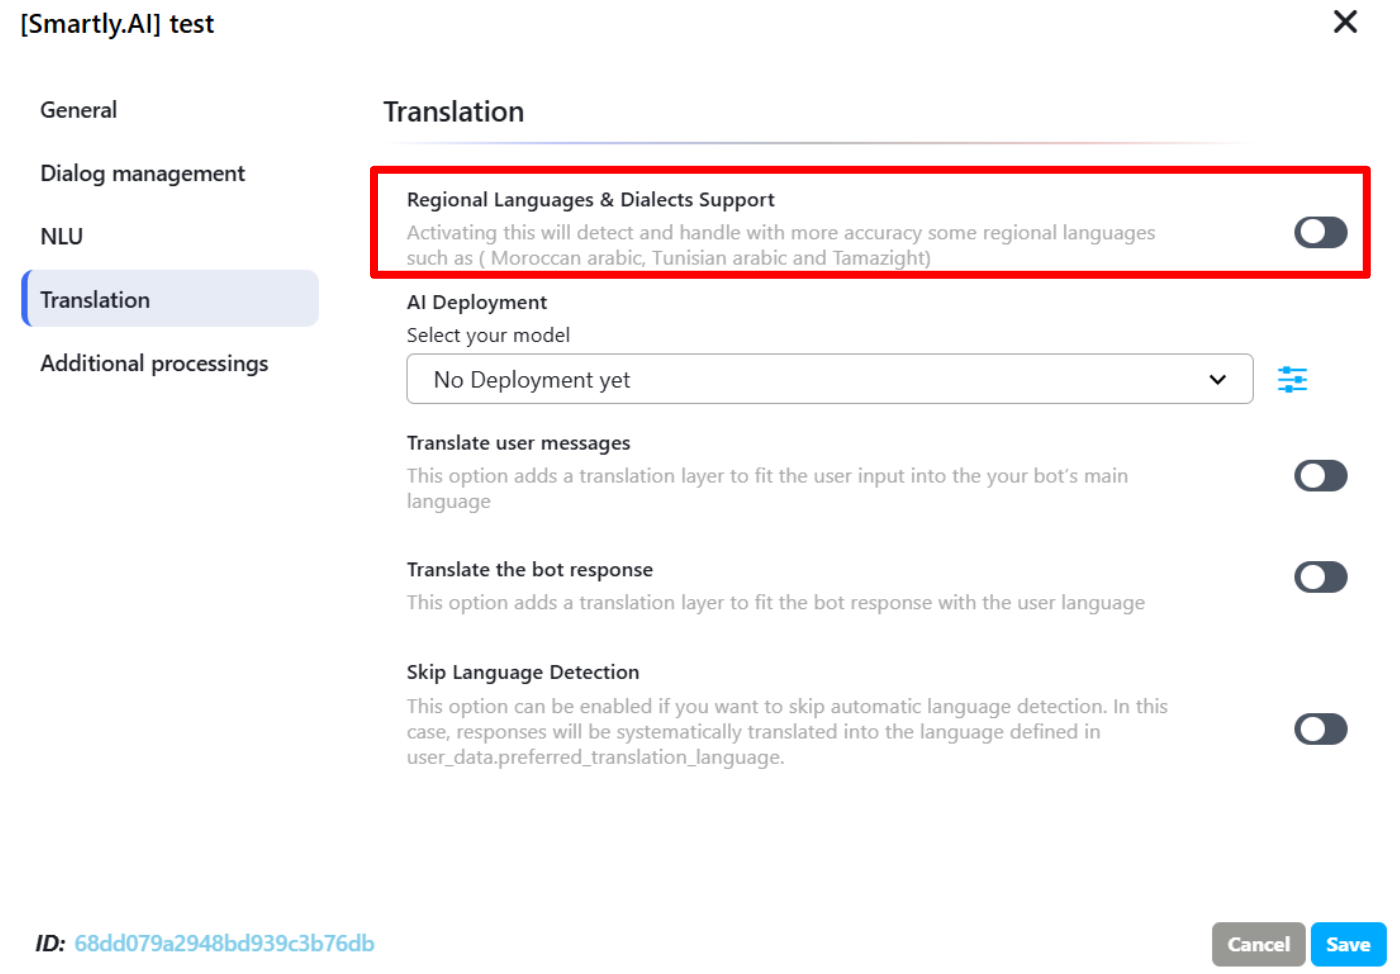
This is a critical feature for markets where users speak local dialects rather than formal language.
- How it works: Enable the "Regional languages & Dialect support" toggle.
- The Advantage: Unlike standard translators (which often fail at slang or dialects), this uses Smartly.ai’s proprietary models optimized for Moroccan Darija, Tunisian Arabic, Tamazight, etc..
- Best Practice: Always enable this if your target audience uses local dialects to ensure they feel understood.
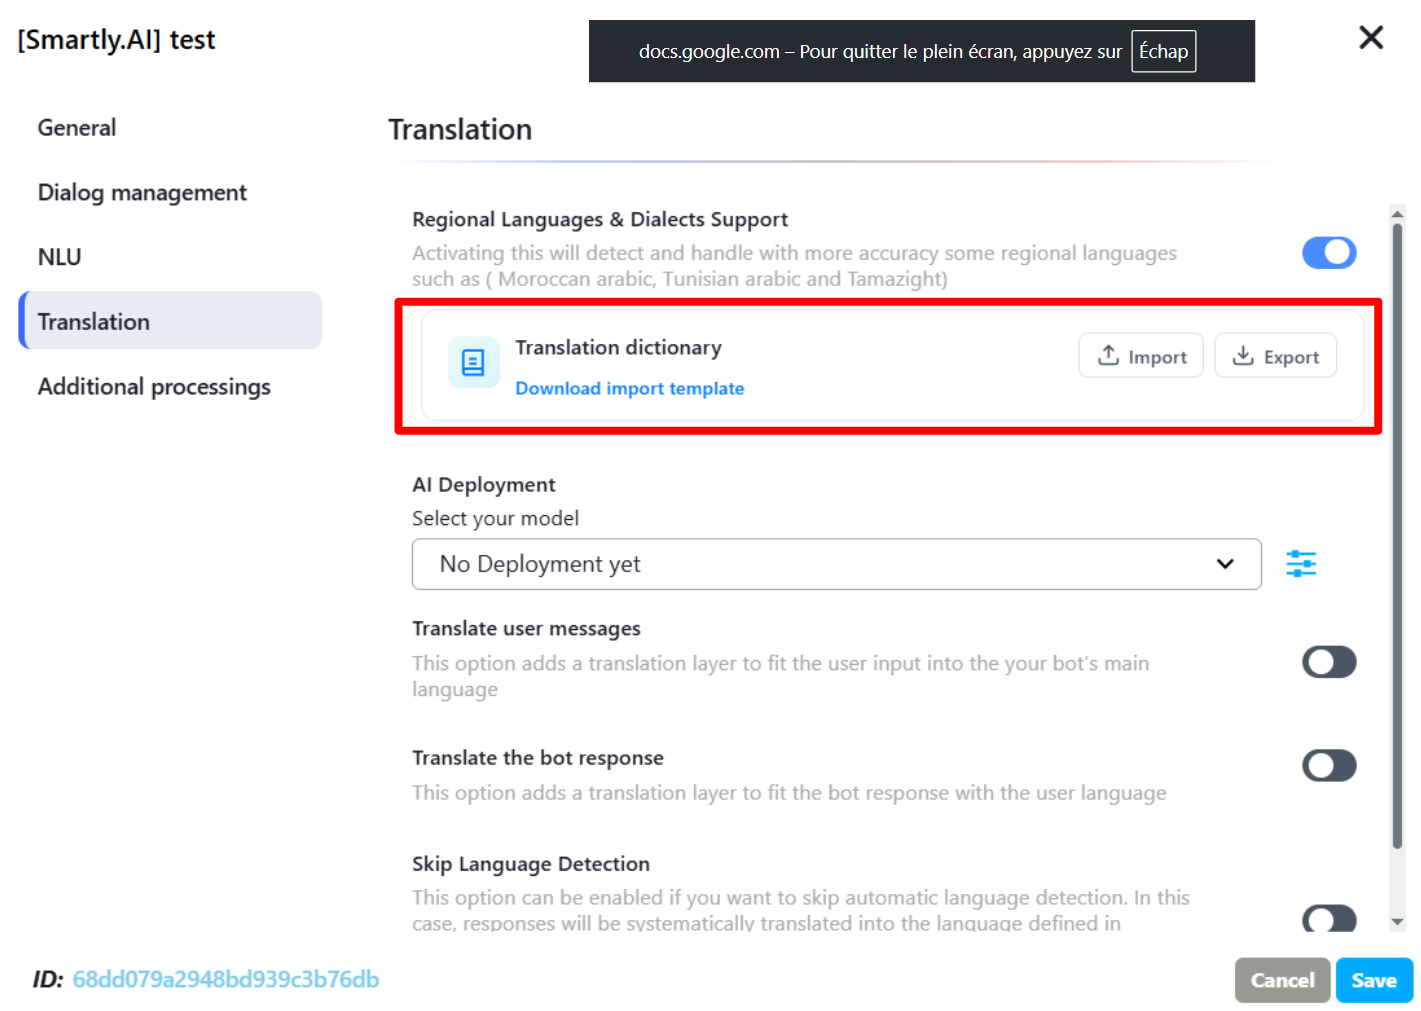
B. Translation Dictionary (Glossary)
The Translation Dictionary gives you manual control over specific terms.
-
Purpose: Prevent the AI from translating brand names, technical jargon, or specific company terms (e.g., ensuring "Smartly" stays "Smartly" in every language).
-
Additional Usage: The Translation Dictionary is used both:
- To improve the understanding of user messages.
- To control how the bot formulates its responses.This ensures terminology remains consistent throughout the conversation, regardless of the language used by the customer.
-
CSV File Structure: When managing your dictionary, ensure the CSV file contains a column for each language added to your bot.
-
Empty Cells & Fallback: If a translation cell is left empty for a specific language, the system will not fail. Instead, it will automatically let the LLM (AI Model) choose the most appropriate words for that specific translation.
-
Management: You can download a template and Import/Export CSV files containing your custom word pairs.
3. AI Translation Configuration
A. AI Model Selection
- Select your model: Choose the specific AI engine (e.g., Azure OpenAI GPT-4o) that will perform the translations.
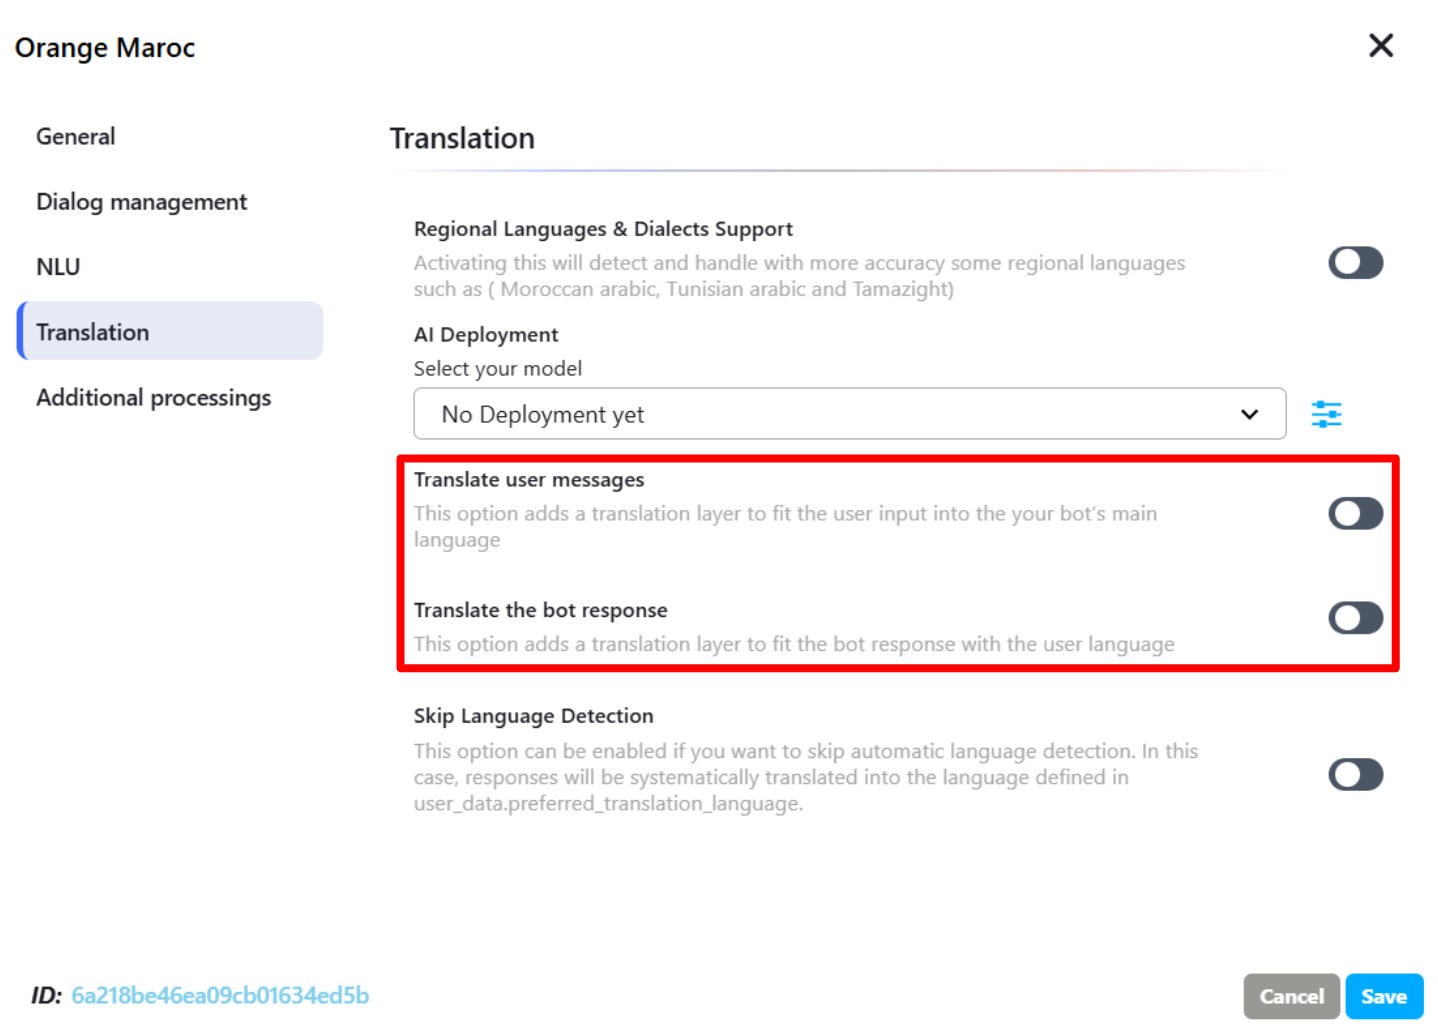
B. Directional Translation
- Translate user messages: Translates the user's input into the bot's native language (the "Graph Language") before it reaches the NLU. This allows one single intent structure to work for all languages.
- Translate the bot response: Translates the bot's reply back into the user's detected language, ensuring a fluid, natural conversation.
4. Custom Instructions (System Prompts)
You can fine-tune the "personality" and accuracy of the translation using the Open Editor buttons for both User and Bot messages:
-
User Message Instructions: Example: "Ignore spelling mistakes" or "Always treat informal 'tu' as formal 'vous'."
-
Bot Response Instructions: Example: "Maintain a professional and polite tone" or "Never translate URLs, prices, or product names found in brackets."
5. Skip Language Detection & Expert Mode
A. The "Skip Language Detection" Option
The Skip Language Detection option allows you to bypass the automatic language detection mechanism.
- Why use it: It bypasses the AI's automatic detection, which saves API costs and avoids the risk of the AI guessing the wrong language.
- How It Works: Normally, the platform detects the user's language at the beginning of the conversation and translates content accordingly.
When Skip Language Detection is enabled:
-
The system no longer tries to identify the user's language automatically.
-
The language must be provided manually through the variable: user_data.preferred_translation_language
WARNING: Language detection is not 100% reliable, especially when users
- Mix multiple languages.
- Use short messages.
- Write in local dialects.
- Use transliteration (Arabizi, Romanized Arabic, etc.).
If you already know the user's language, enabling Skip Language Detection is recommended.
B. Forcing a Translation Language
If you want the AI to translate the conversation into a specific language for the user:
-
Variable: user_data.preferred_translation_language
-
Use Case: You have one graph (e.g., in English) and you want the AI to translate it into French or Arabic on the fly.
This variable forces the AI translation engine to translate the conversation into a specific language.
user_data.preferred_translation_language = "fr-fr";C. Switching Between Graphs
If you have built separate graphs for each language (e.g., a specific graph for French and another for Arabic):
- Variable: user_data.preferred_language
- Use Case: You want the bot to physically jump from the English graph to the Arabic graph.
WARNING: DO NOT CONFUSE THESE VARIABLES
Never use user_data.preferred_language if you only want the AI to translate your text. If you set this variable to a language that does not have its own dedicated graph (e.g., setting it to "es" when you only have a French graph), the bot will crash or fail to respond because it will look for a graph that does not exist.
Use: user_data.preferred_translation_language for translation.
Use: user_data.preferred_language only for graph switching.
6. Using NodeJS to Manage Languages
In the Builder (Graph), you can manage these settings dynamically using a NodeJS node. This is useful when you want to set the language based on a button click or a user attribute.
Example 1: Forcing AI Translation
Use this when you want the AI to translate your current graph into the user's language.
// Force the AI to translate the current flow into Moroccan Arabic

user_data.preferred_translation_language = "ar-ma";
Example 2: Switching the Graph (Multi-Graph bots)
Use this only if you have a physical graph file for that specific language.
// Jump to the dedicated French graph

user_data.preferred_language = "fr-fr";Never use this variable for translation purposes.
Example 3: Performance Optimization Logic
You can use a NodeJS node at the start of your bot to detect and set the language, avoiding unnecessary API calls.
// Logic: If the user is from a specific region, force translation
if (user_data.region === "Morocco") {
    user_data.preferred_translation_language = "ar-ma";
} else {
    // Default to the native graph language to skip translation calls
    user_data.preferred_translation_language = "fr-fr";
}Performance Tip
Using the full ISO code (e.g., fr-fr instead of fr) is best practice. If the preferred_translation_language matches the bot’s native graph language, the system automatically bypasses the translation engine, saving API costs and reducing response time.
Updated about 1 month ago