Crisp
What is Crisp?
Crisp is a simple and affordable customer center tool.
It can allow you to add a human touch to your chatbots.
Crisp has some really interesting features such as routing rules, advanced stats on agents and mobile apps to let them answer user requests on the go.
You can check their website for more details on their product.
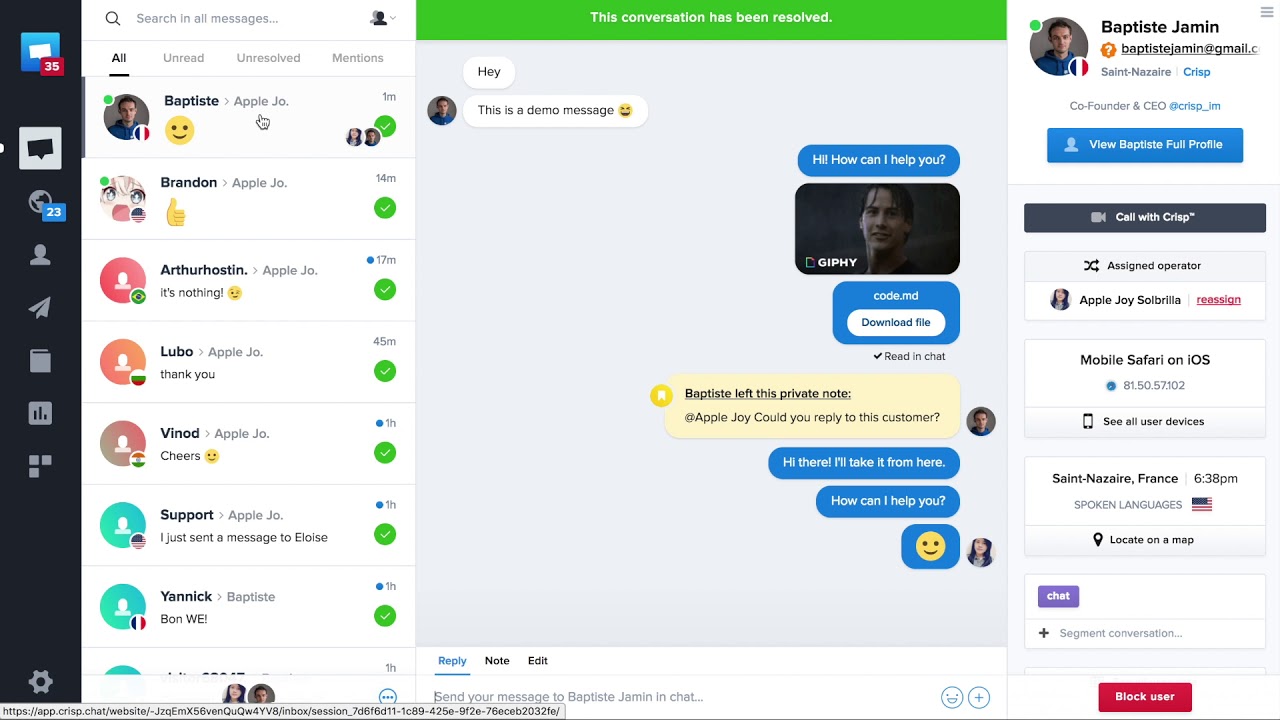
A screeshot from the Crisp back office
Our integration with Crisp
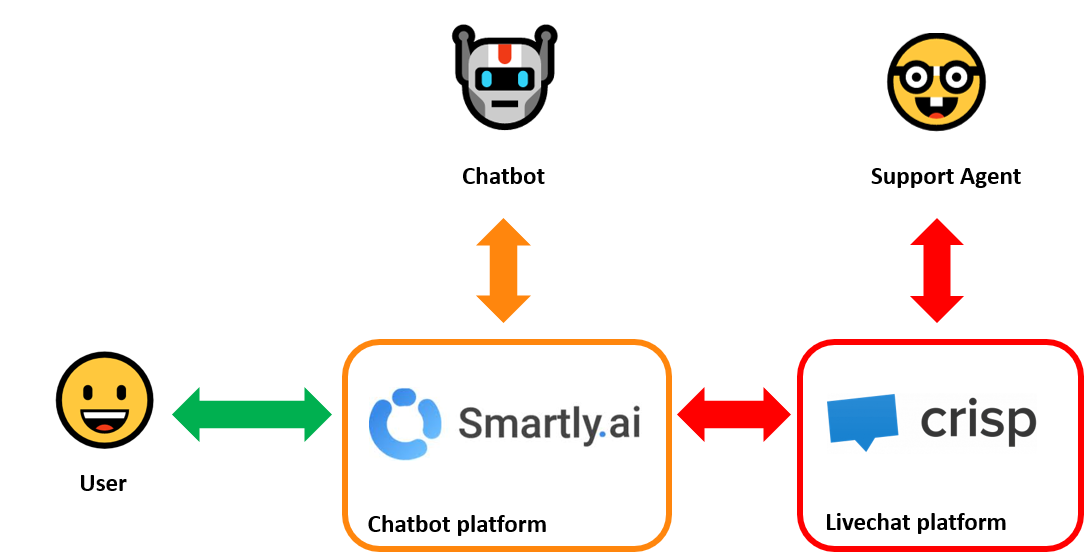
With Smartly.AI expertise in Conversational AI and Crisp expertise in human handover, you get the best of breed solution.
Basicaly, your chatbots will always be in front of the user, automating what they can. That means that for instance, all discussions will continue to happen on Smartly.AI's webchat, facebook page,...
When necessary, your bot will be able to pass the relay to a human agent within the same channel.
If no agent is available during the escalation, the chatbot will detect it and ask the user to come back later with a customizable message.
Below is a vizualisation of the different flows happeining with Smartly.ai <> Crisp integration.
What are the supported channels ?
Our Crisp connector allows you to escalate on conversations occuring on the following channels
- Webchat
- Facebook Messenger
Step by step tutorial
Here is the different steps to follow to add Crisp handover to your chatbot:
1) Sign up to Crisp
To do so, simply follow this link and fill the form
2) Set up your Smartly.ai <> Crisp integration
From the Builder module, click on Integrations > Crisp
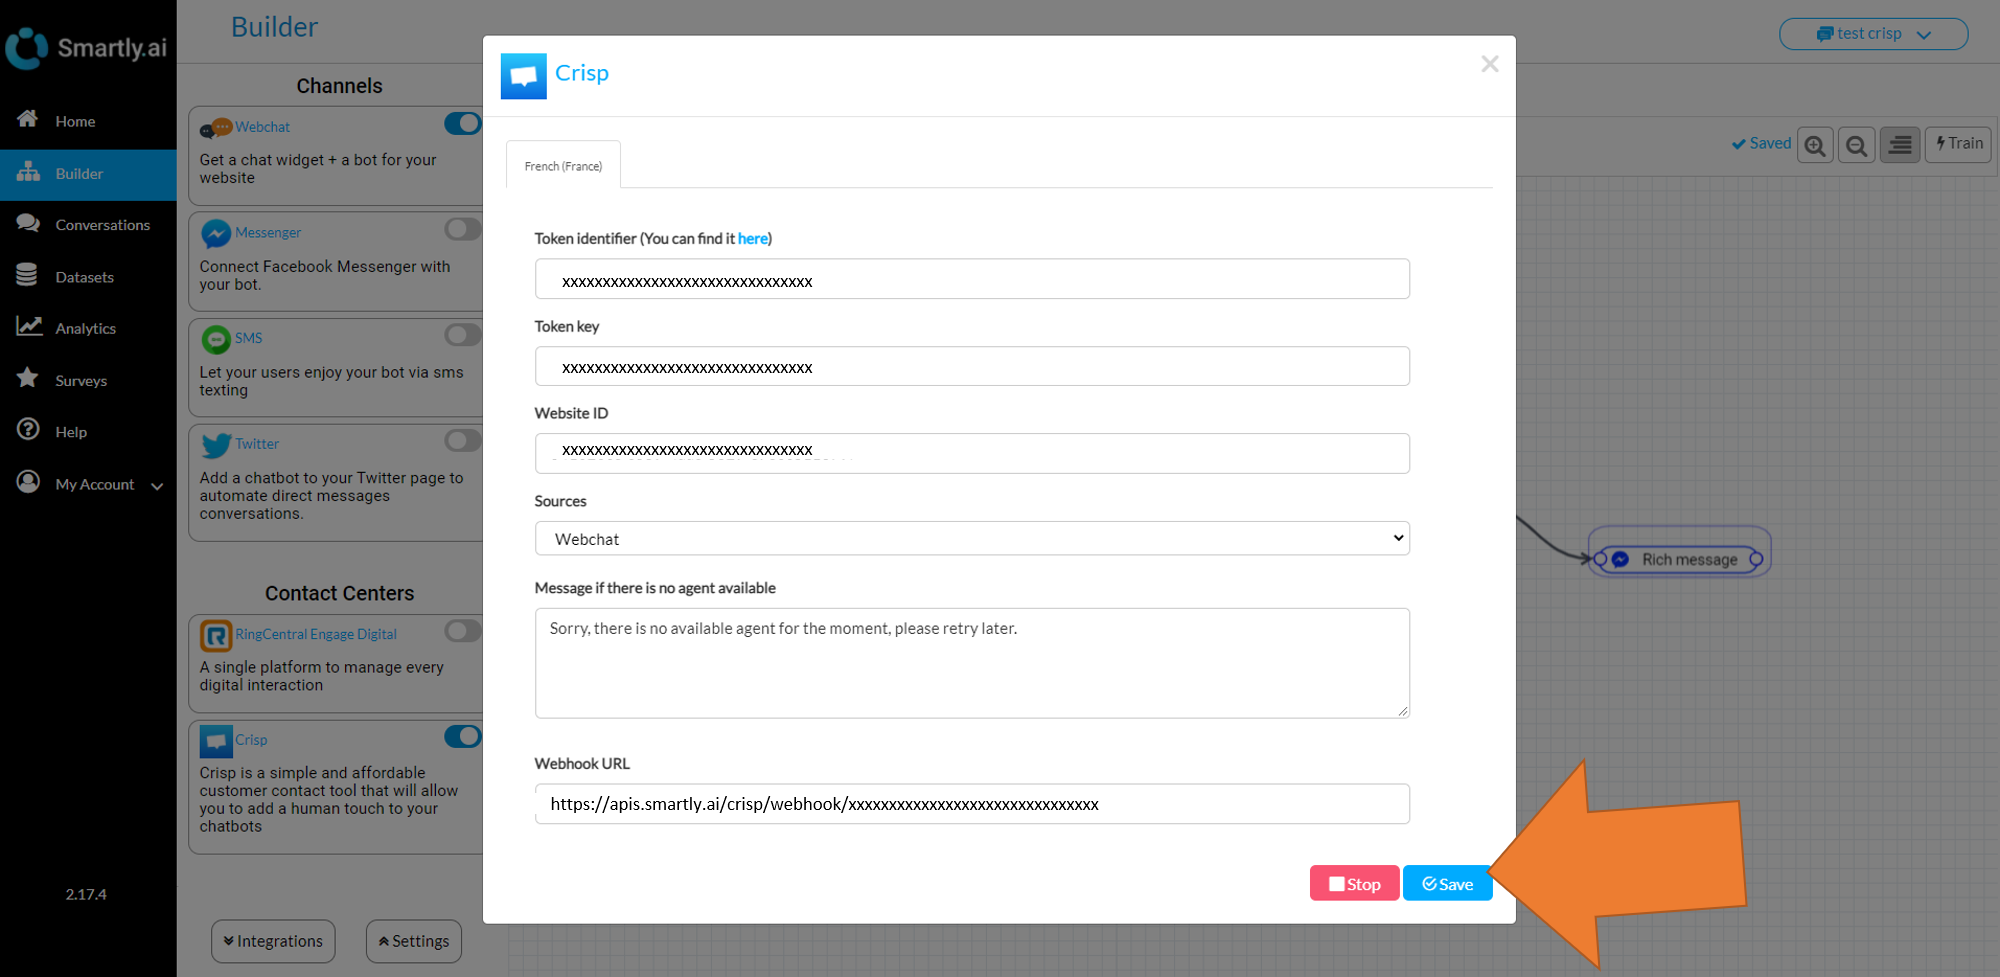
Now, let's see how we will find / use the information available in this integration ! 🙂
Token Identifier / Token key
To get your token, you will have to call the Crisp API using this cURL:
curl -H "Content-Type: application/json" -X POST -d '{"email":"YOUR_ACCOUNT_EMAIL","password":"YOUR_ACCOUNT_PASSWORD"}' https://api.crisp.chat/v1/user/session/login
YOUR_ACCOUNT_EMAILandYOUR_ACCOUNT_PASSWORDmust be replaced by your actual Crisp email and password.
Website ID
As for the Website, it's not complex either, you can find it by browsing the following UI path in your Crisp console: Settings > Website Settings > Setup instructions
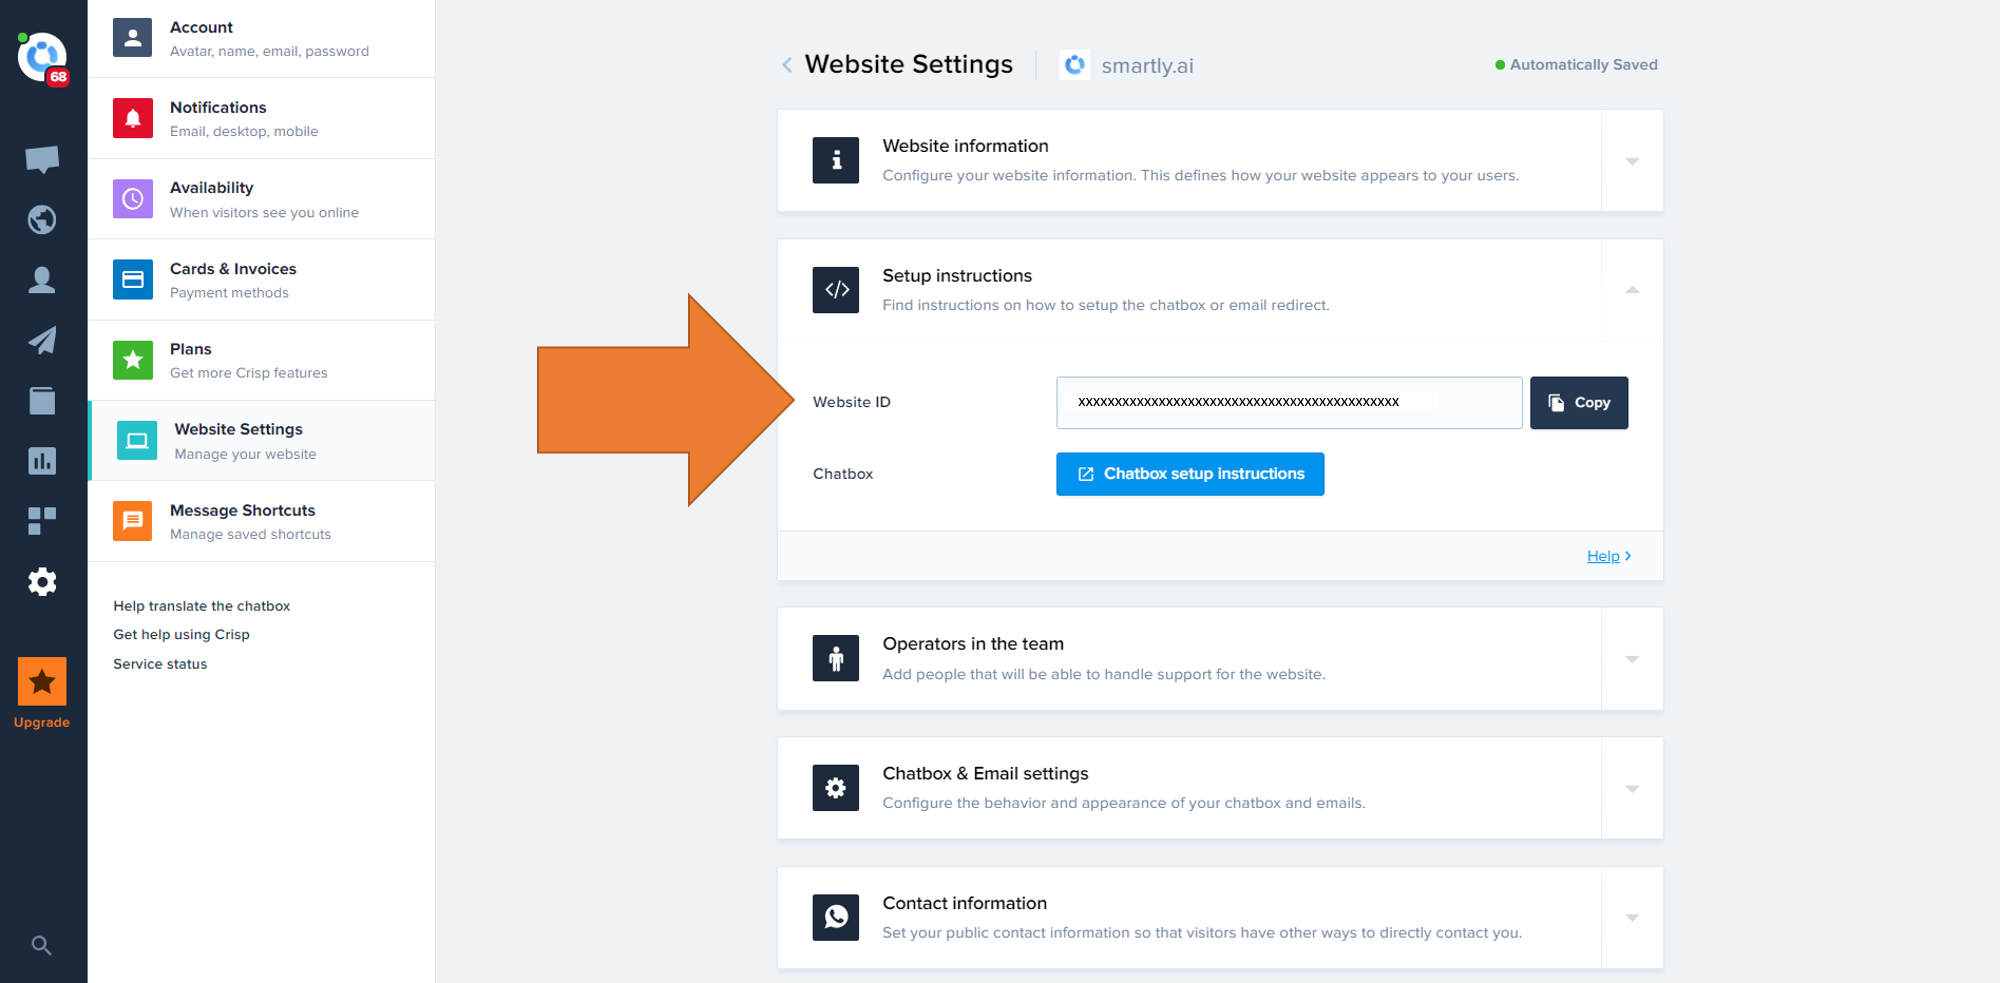
Then simply copy/paste it in the dedicated field in your Smartly.ai console.
Sources
This field is aimed to let you choose on wich fields you want the escalation to happen.
Currently, Crisp livechat is only available on Smartly.ai's webchat
It will soon be also available in Messenger & Twitter too.
Message if no agent is available
This message will be sent in the situation where a user is asking for handover but no agent is available.
The default message will be shown if no agent is available.
You can also define a more advanced message using our rich messages json syntax.
Here is an example you can use in this field
[
{
    "quick_replies": [
        {
            "payload": "Contact me back via email",
            "title": "Contact me back via email",
            "content_type": "text"
        },
        {
            "payload": "Continue with the bot",
            "title": "Continue with the bot",
            "content_type": "text"
        }
    ],
    "text": "It seems that nobody is available right now "
}
]
putting the json above here...
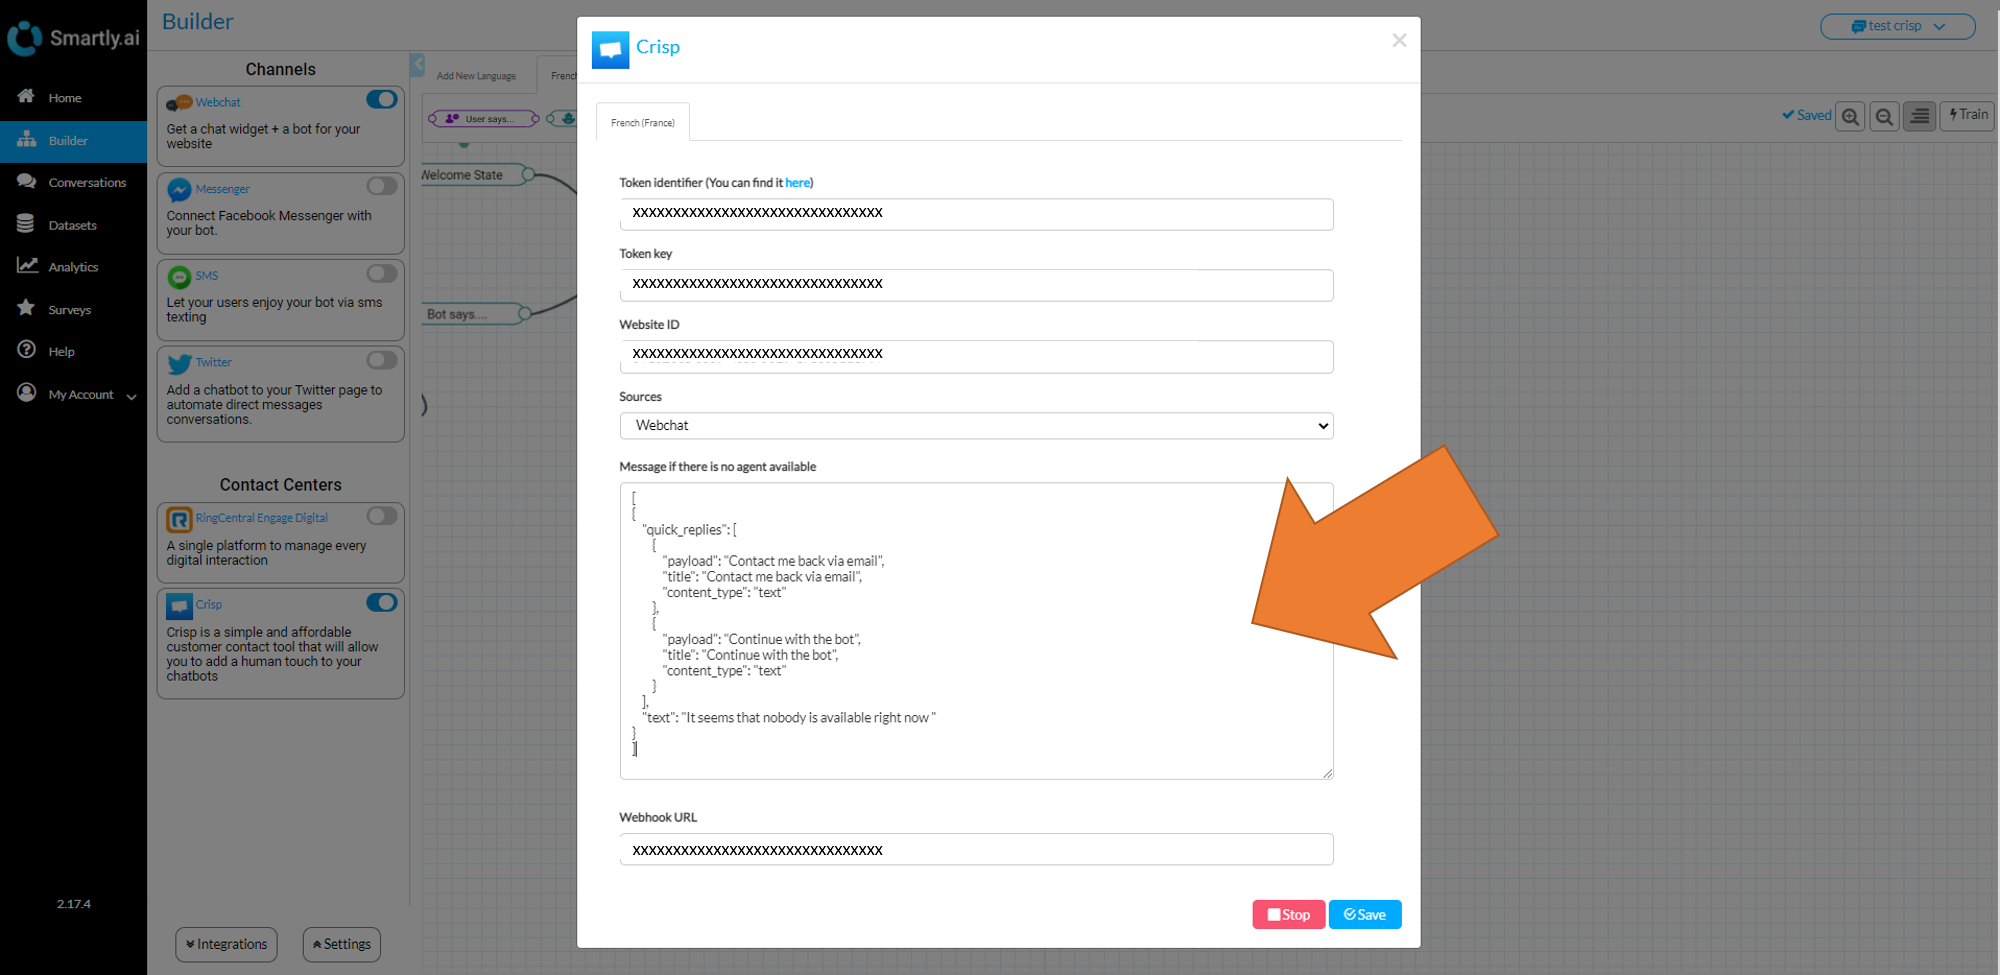
will lead to this:
Webhook URL
In order for Crisp to send agent messages as well as conversation resolution status, you will need to create a webhook.
To do so go to Settings > Website Settings > Advanced configuration and click on Add a Web Hook
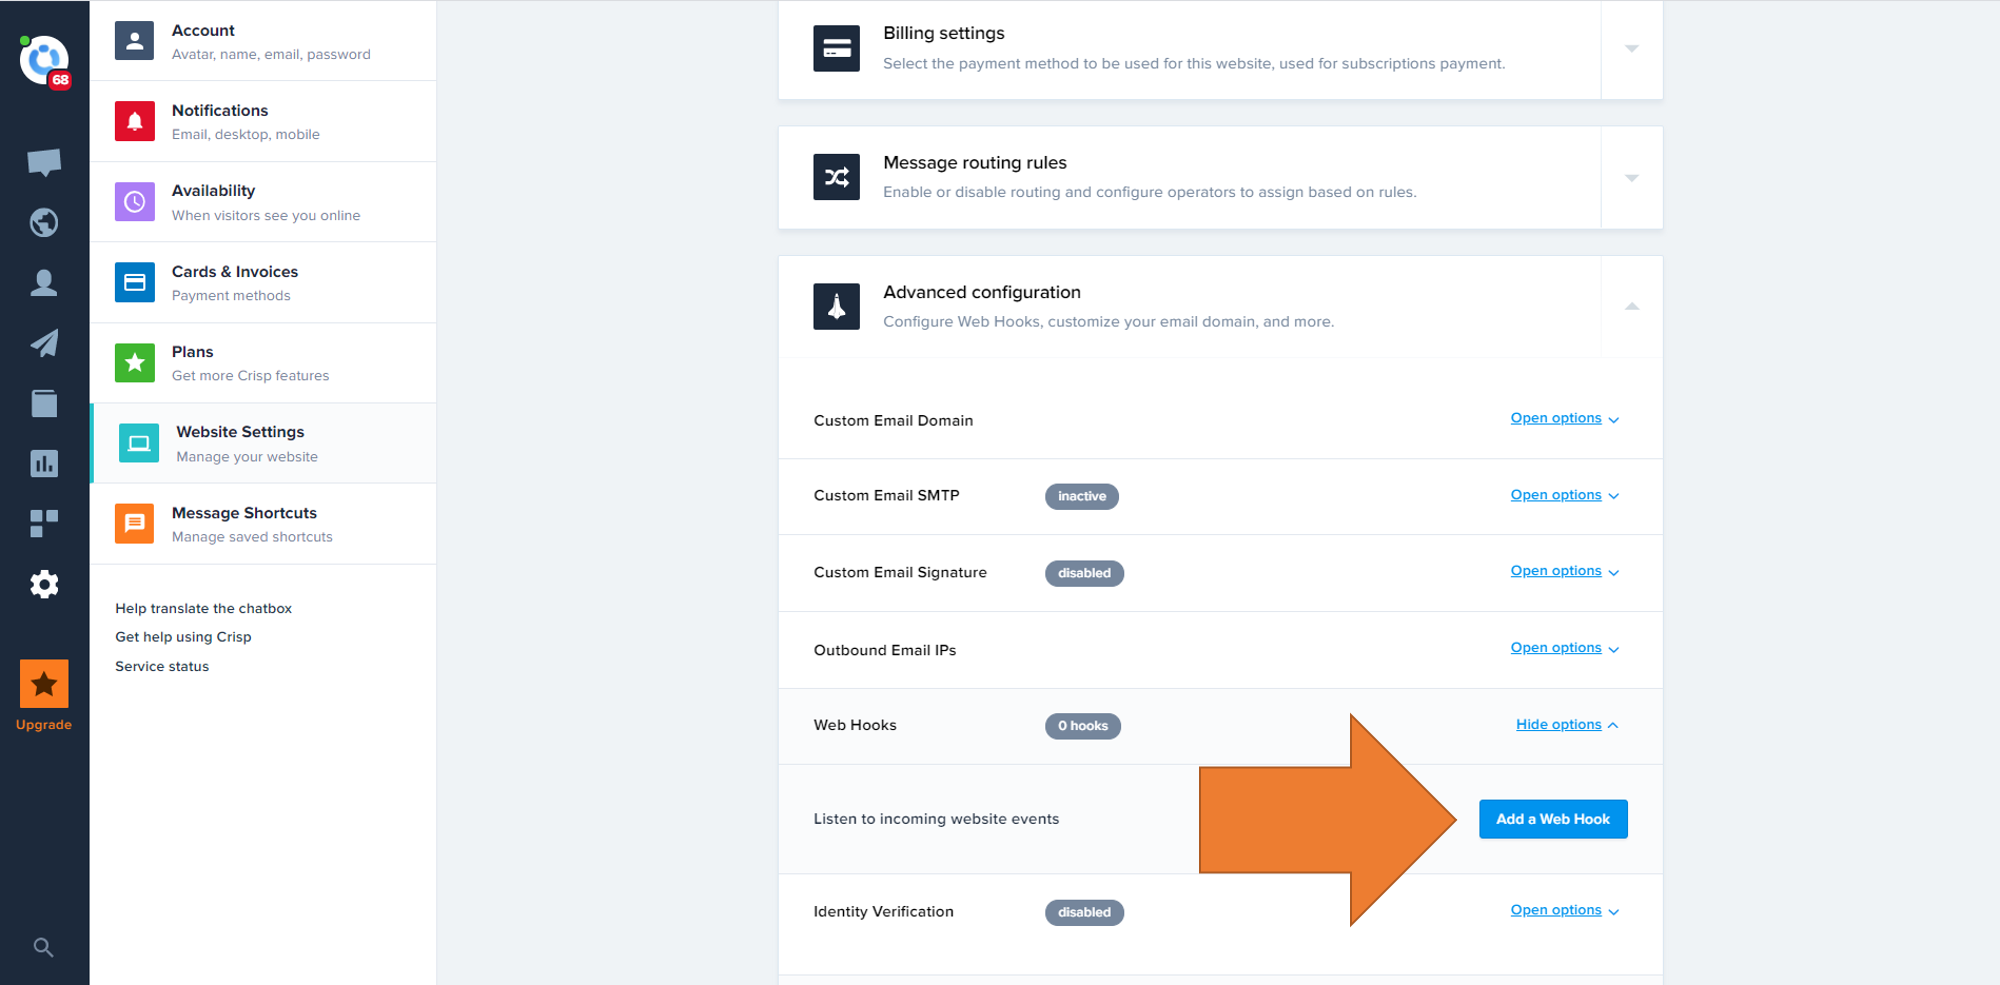
You will then have the following form to complete
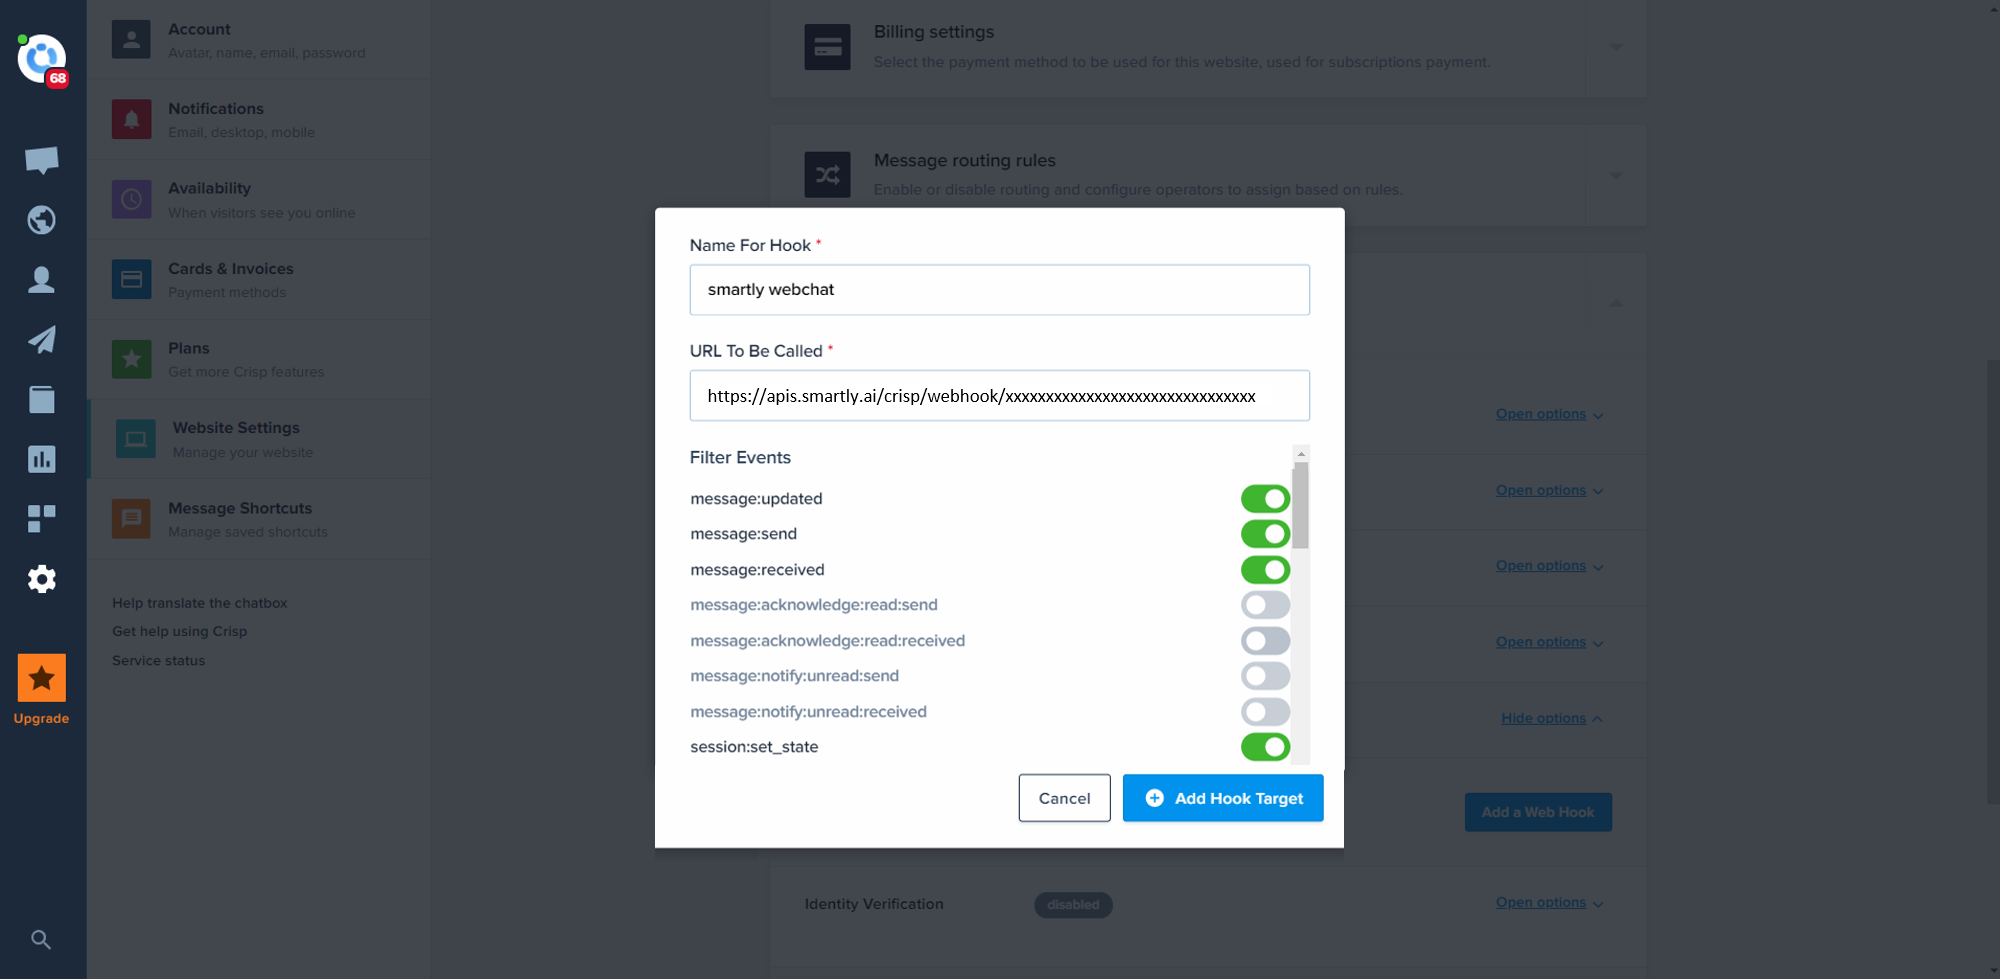
Here is the information will need at this point:
- Name for hook: give a name related to your webchat / chatbot so you can remember it easily later
- Url To Be Called: this url can be found in the Crisp integration in Smartly.AI, simply copy and paste it
- Filter Events: here is the events you will need to properly set your integration:
=>message:send
=>message:updated
=>message:received
=>session:set_state
With this, click Add Hook Target and your webhook is created .
That's it, you can now hit save, your Crisp integration is up and running! 💯
Define when the handover should happen
The best solution is to have an intent attached to a Bot Shows object.
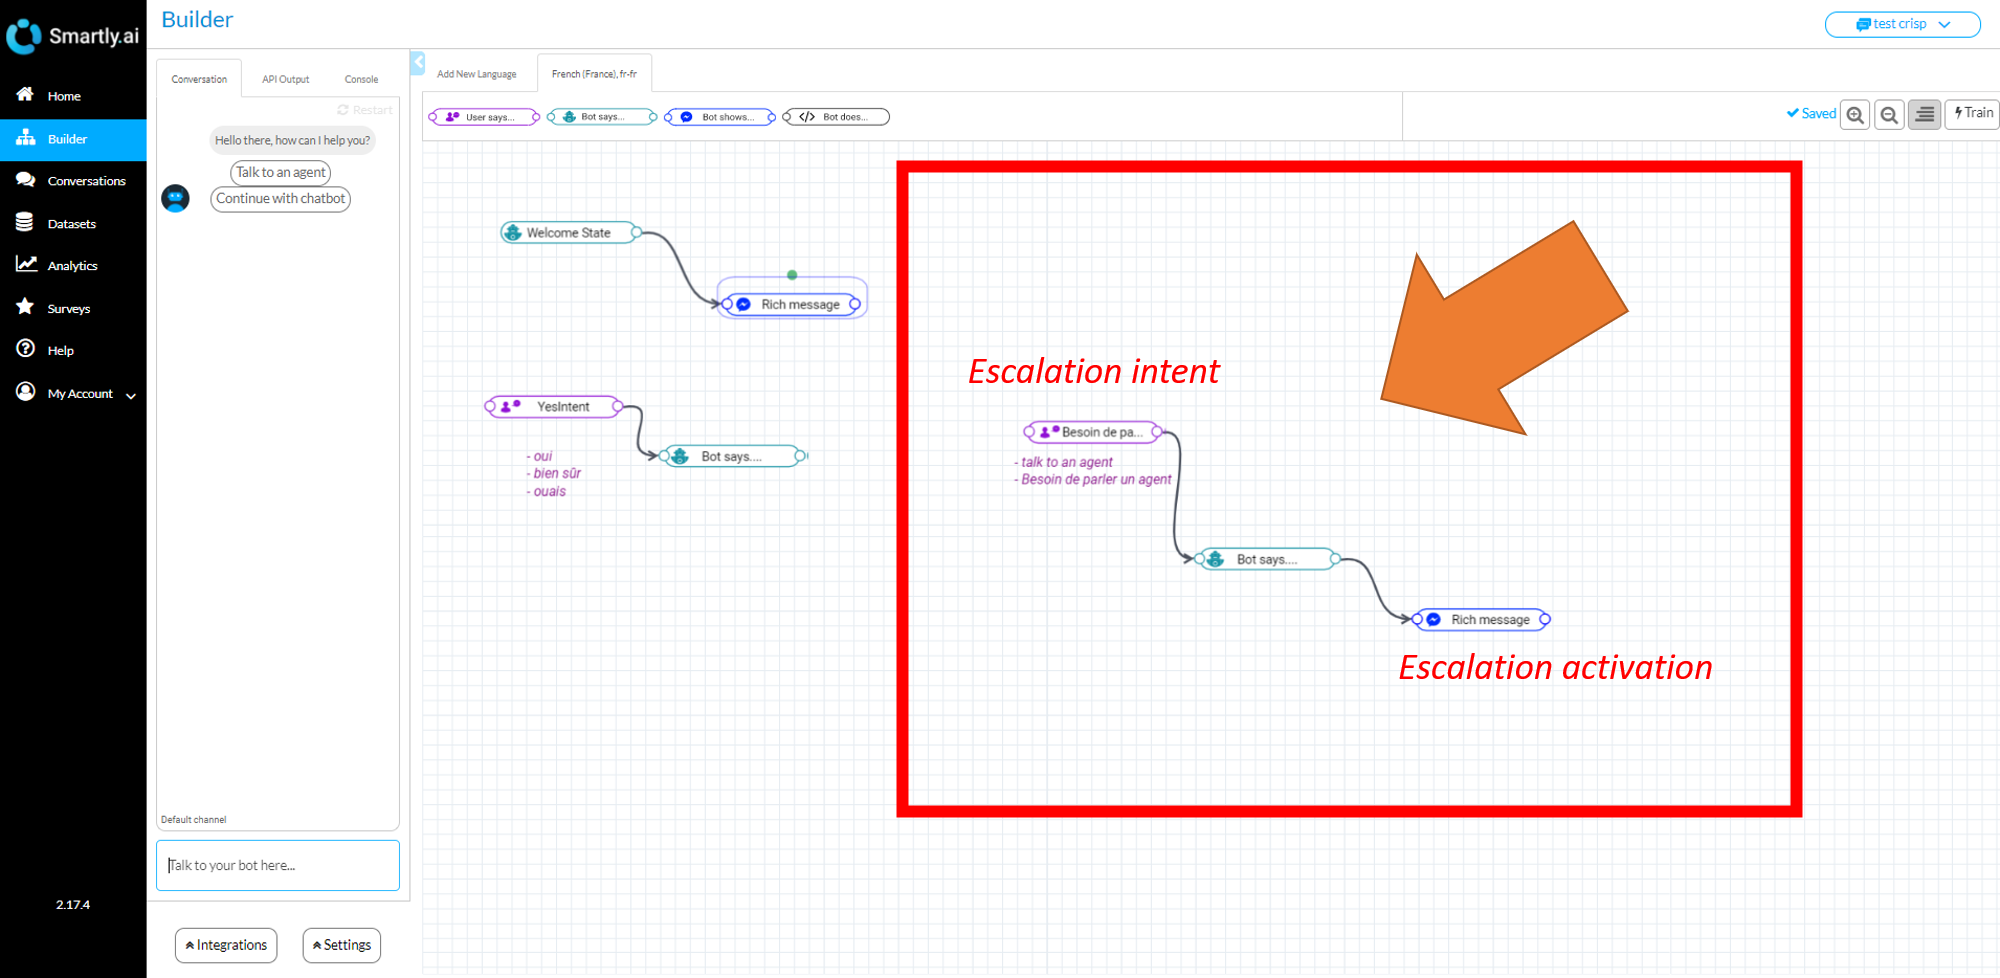
From there, add a message like "Ok, I will check if an agent is available right now"
Click on Show more options and Escalation and bot muting this means that from there, an escalation request will be done to Crisp.
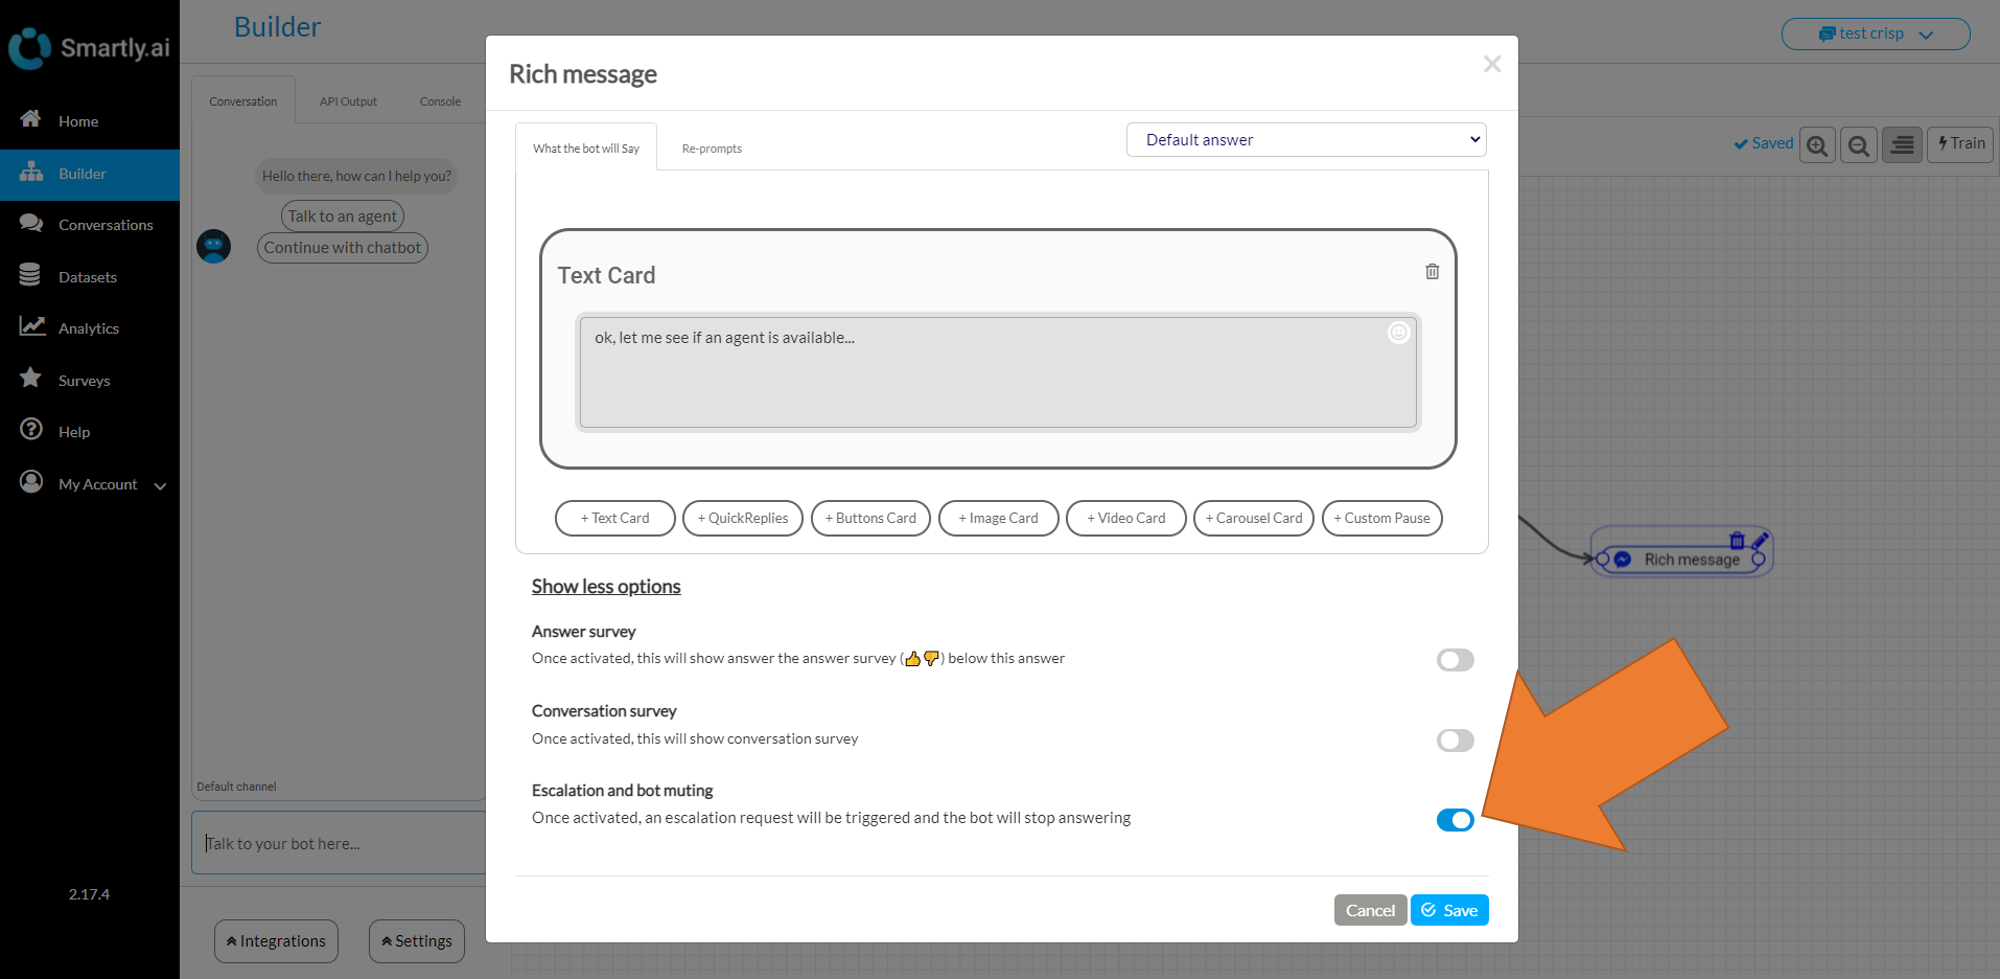
Another option is to do it programmatically using a Bot does.. object and the following code
output.muted = true;
output.need_help = true;
Addtionally you can define a user segment using the following code
output.muted = true;
output.need_help = true;
output.handover_category_name = "Customer";
What happens during the escalation
From the user perspective, if an agent is available on Crisp, the escalation request will be accepted and the user will wait for your agent to answer.
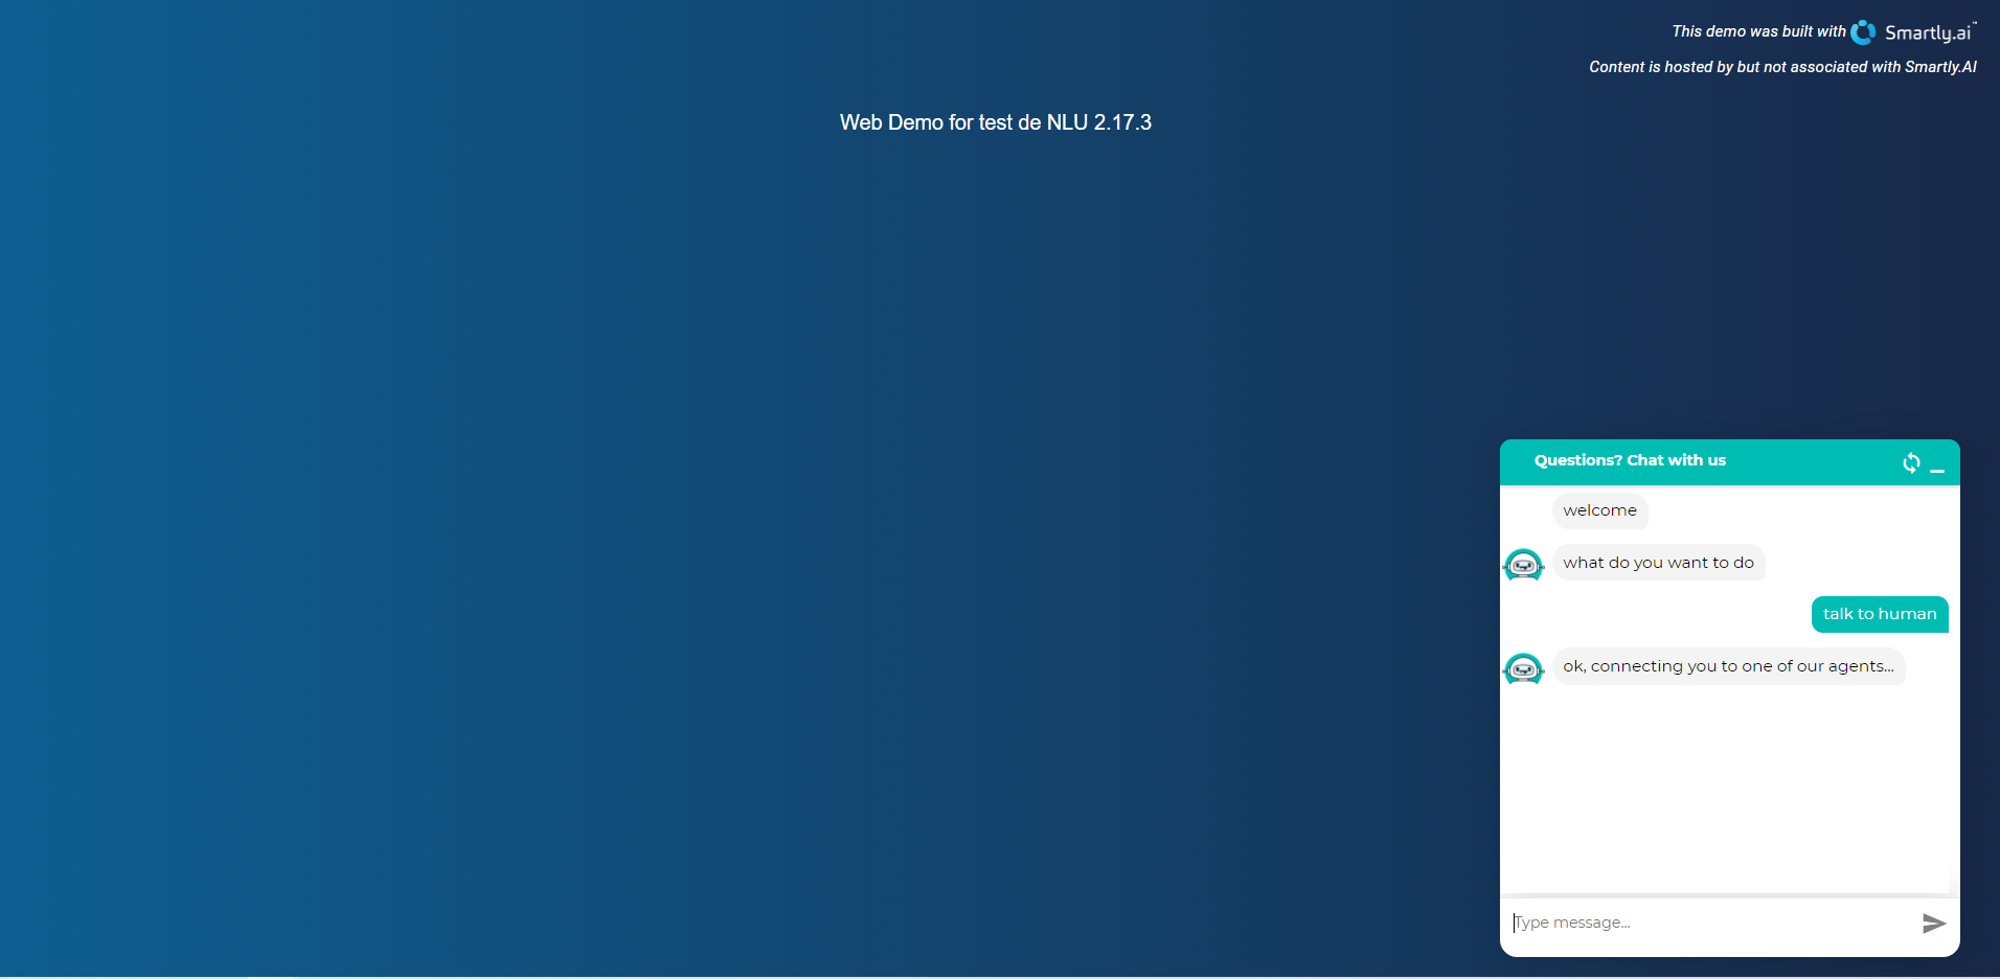
the user has asked for the escalation and started to describe his request
Meanwhile on Crisp, a conversation will be created, with an audio notification or even a browser notification if you have accepted them. From there your agents will be able to answer directly.
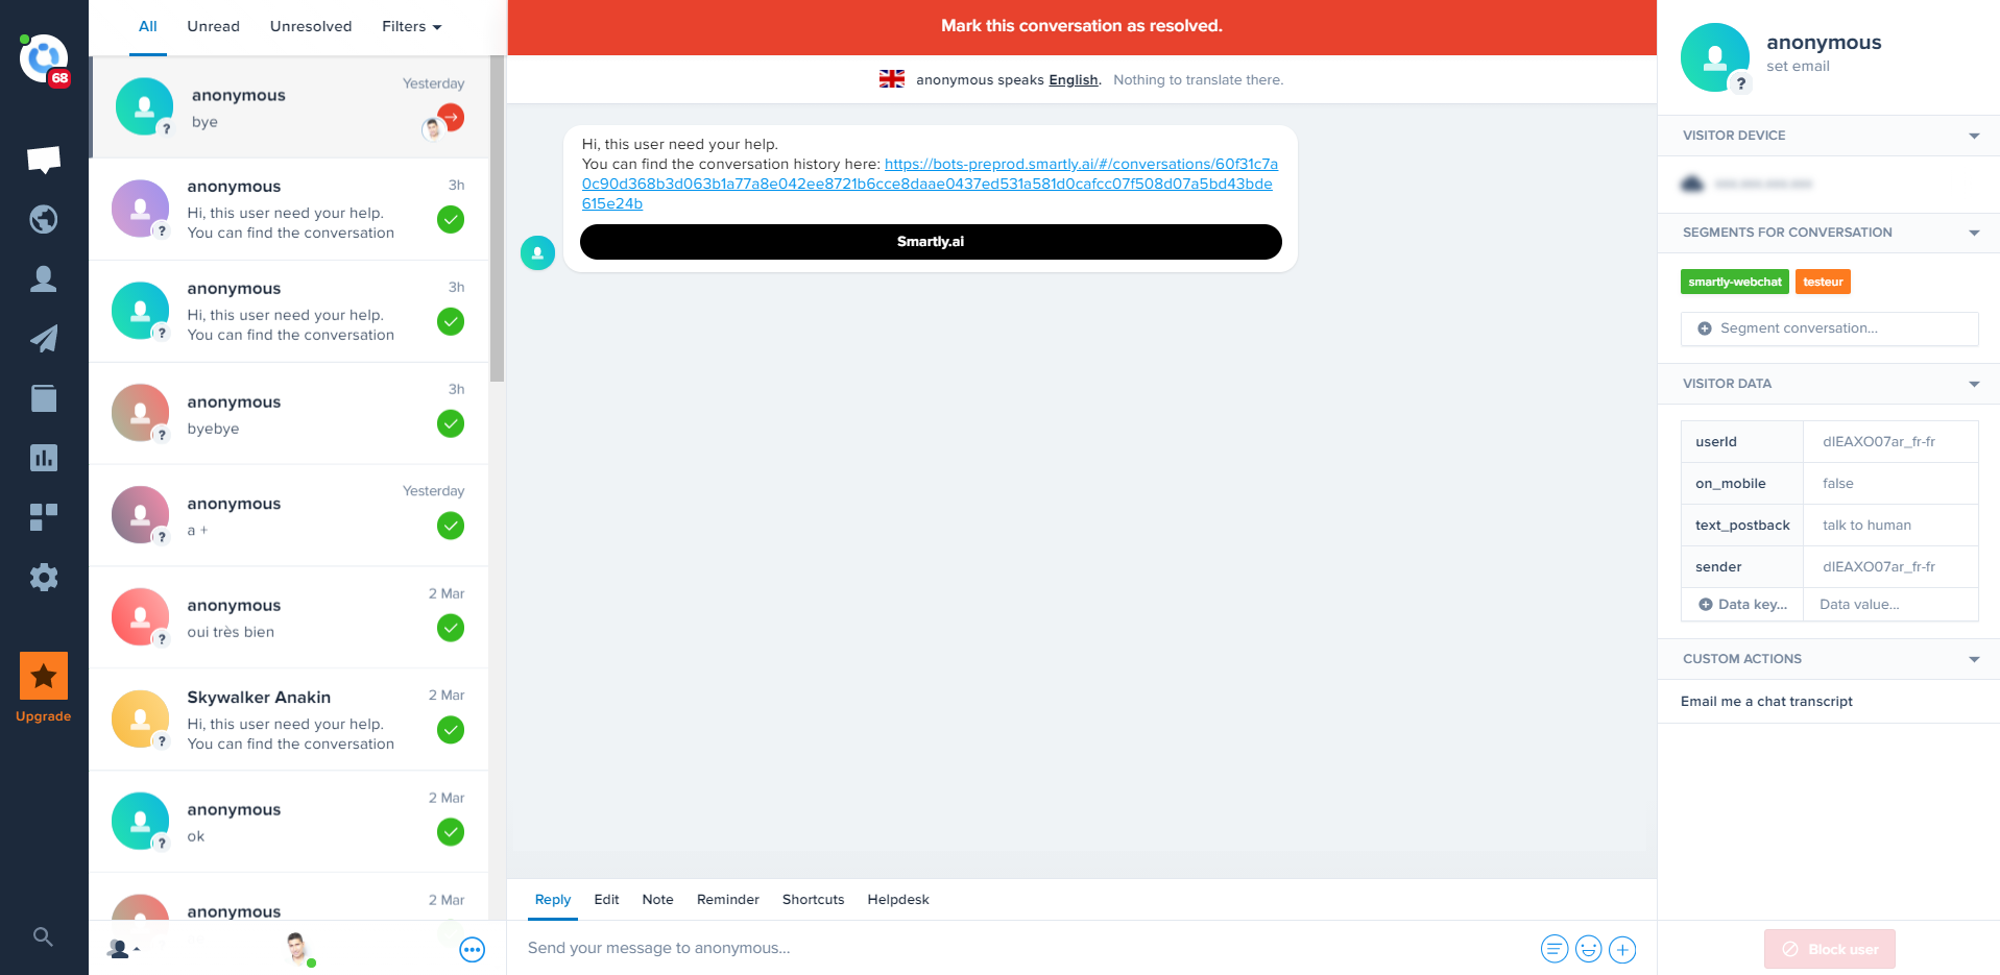
Note: from the agent perspective, each new conversation start with the following message.
Hi, this user need your help.
You can find the conversation history here: [Link to the conversation with the bot]
By clicking on the link, your agents will then be able to answer directly to the user.
Here is a sample link, and the result will be the following
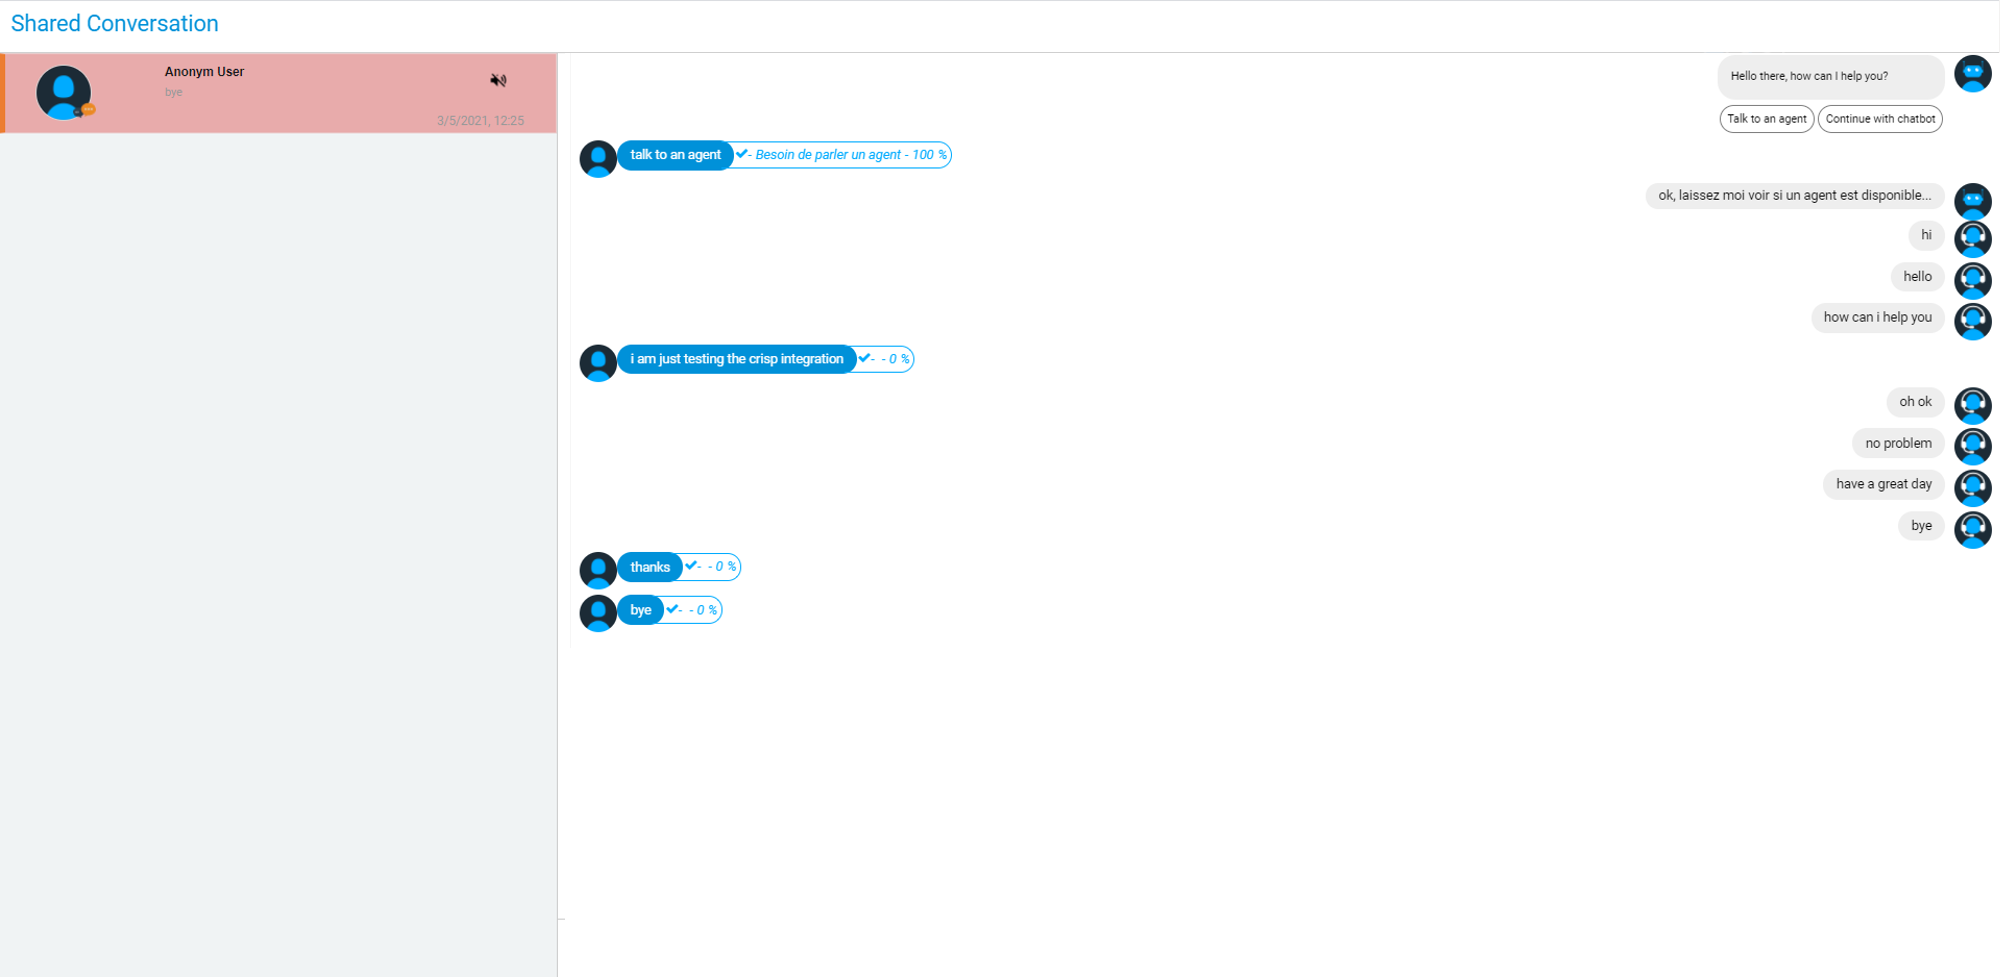
Once your agent is handling the user, each agent messages is pushed directly to the user webchat.
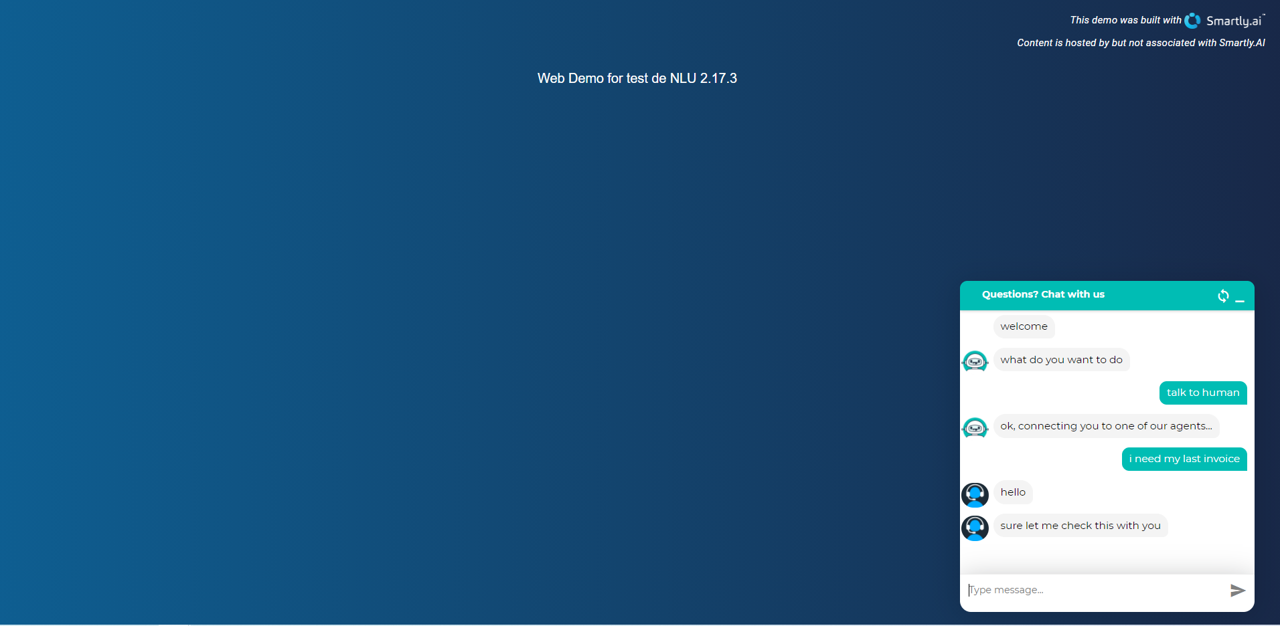
Agents messages will be shown differently
To make sure that the user will read he incoming agent messages, a short audio sound is played at each new message reception.
Once the conversation is over, the agent can set the conversation to Resolved by clicking on the big red button.
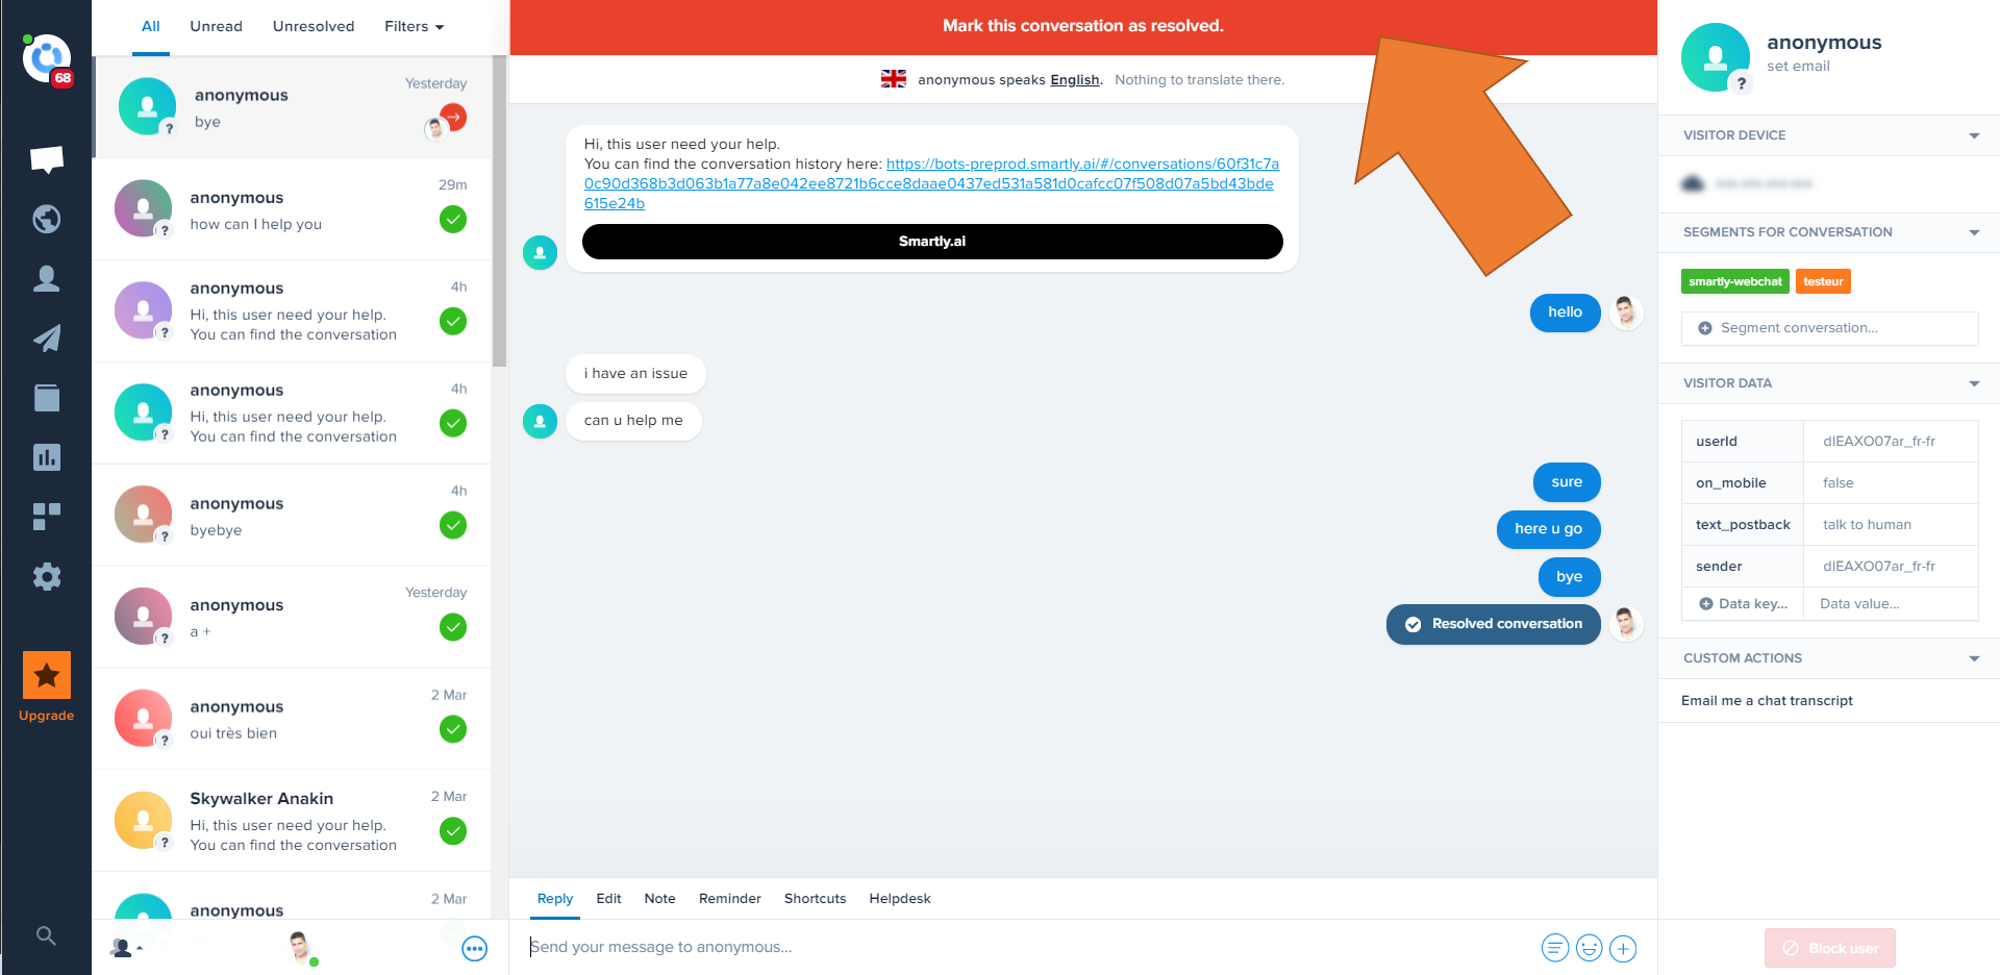
This button will become green.
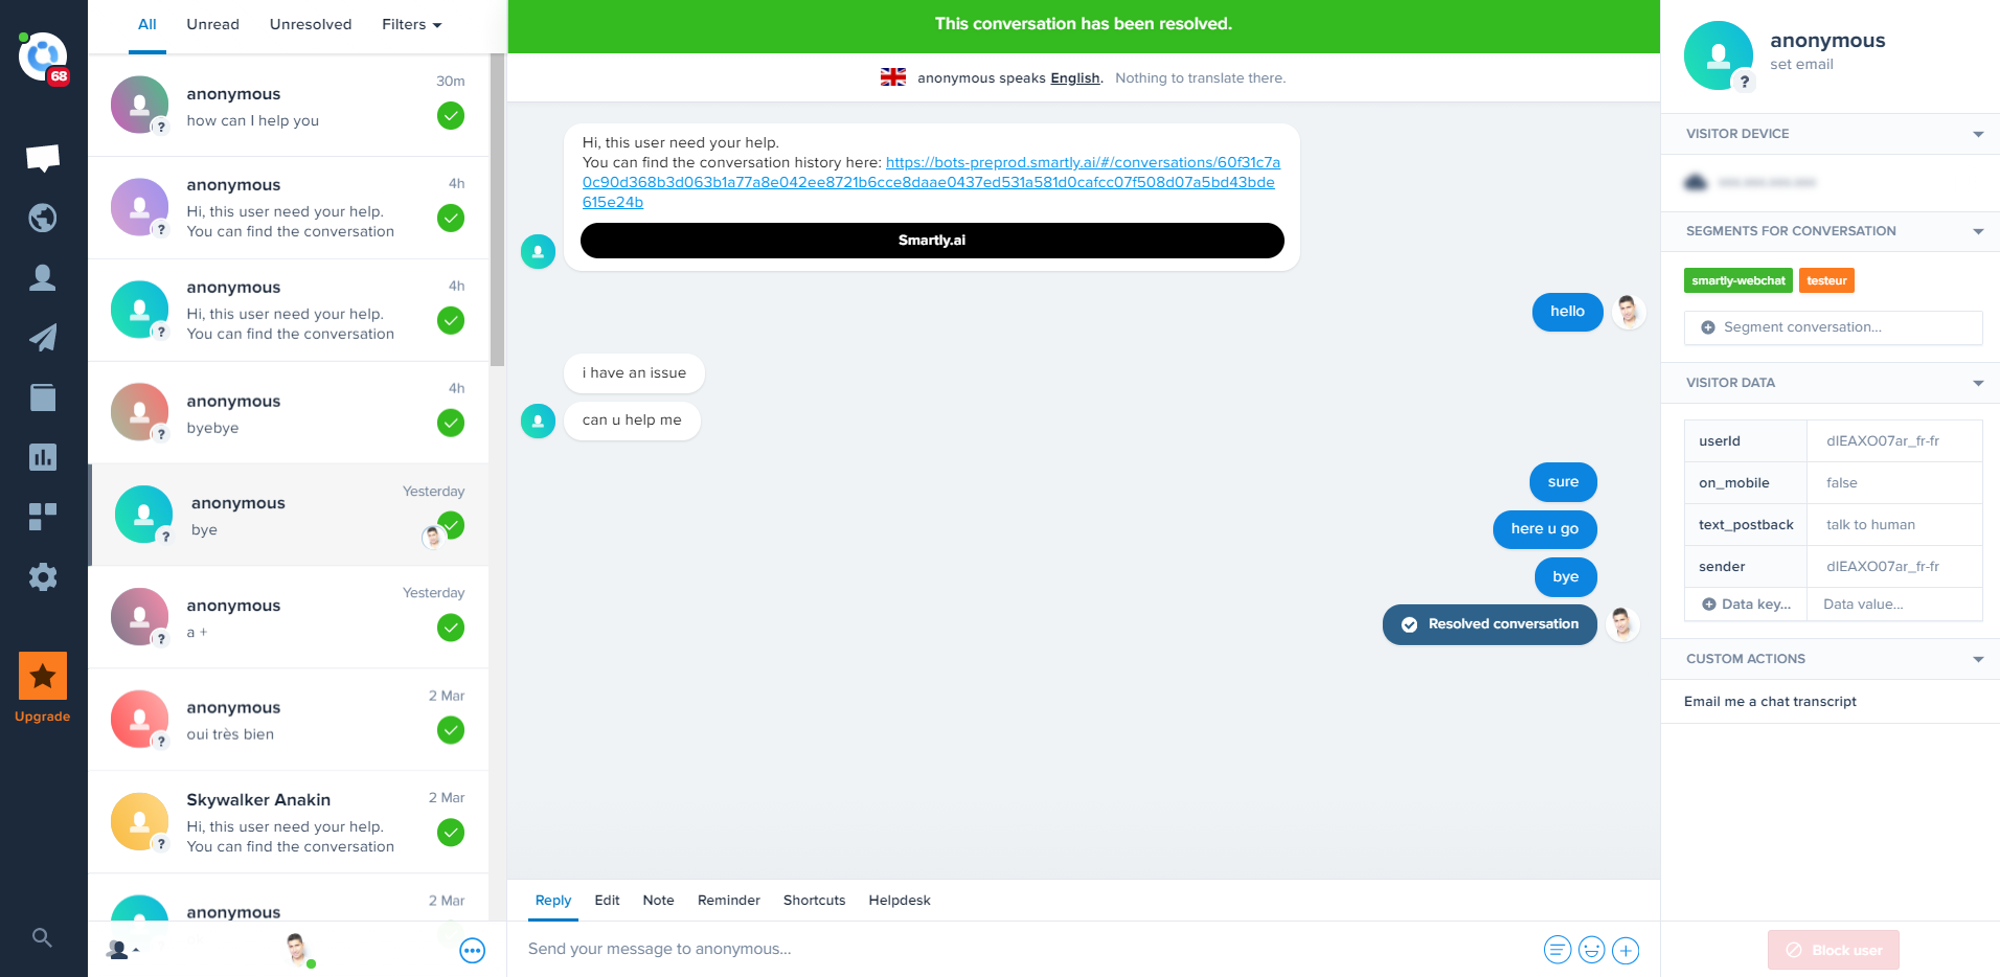
This action will also allow the user to talk to the bot again after the escalation.
Sending user information to Crisp
As part of the escalation the following information will be sent:
- available data in the
user_datafield - a link to a page with the whole conversation history
- the customer segment if defined with
output.handover_category_name
Also we are doing the mapping for you, that means that if the user is logged and we know its name it will be shown in Crisp, along with the phone and email.
A good reason to send the user email to crisp is that you can the continue the conversation via email on Crisp, even if the user has left your website!
For instance, here is what you will see in the Crisp console if you set the following user_data field in your website
var SMARTLY_USER_DATA = {
    "first_name":"Anakin",
    "last_name":"Skywalker",
    "email":"[email protected]",
    "phone_number":"0605776995",
    "gtu_accepted":"false",
    "comments":"in this guy, the force is strong"
};
User data can be sent as a context for your agent
You can have all those features with Crisp's free plan, so what are you waiting for to set your Crisp integration? 🙂🚀
Updated 4 months ago
