Answer Surveys
Need to have a feedback on each answer delivered to your users?
Follow the steps below and you will be good to go!

1 - Creating the survey
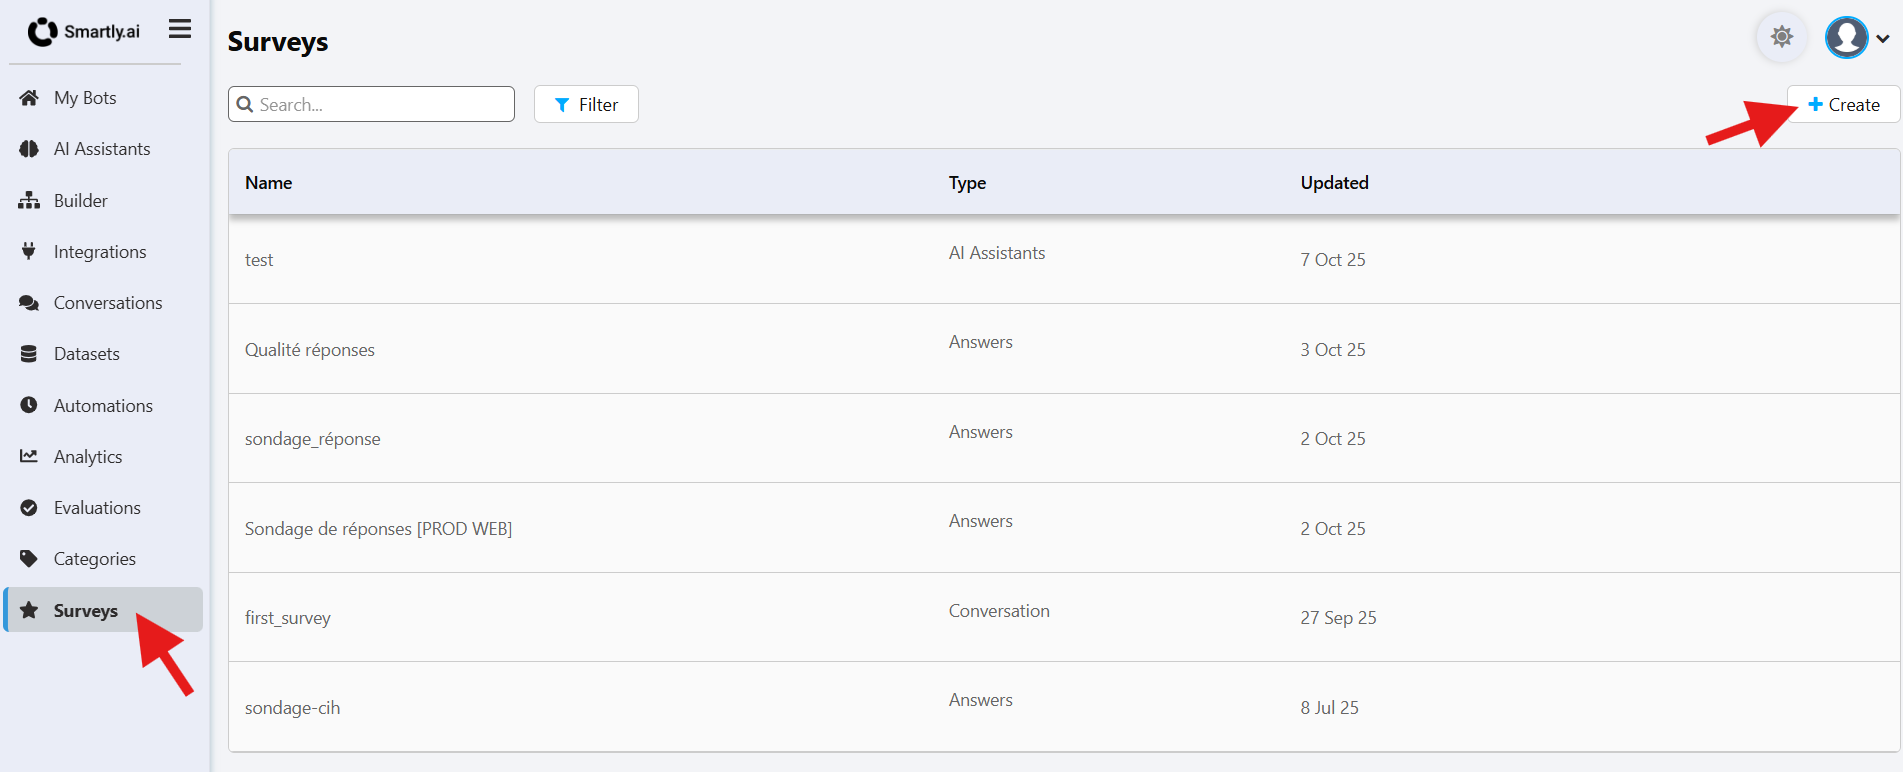
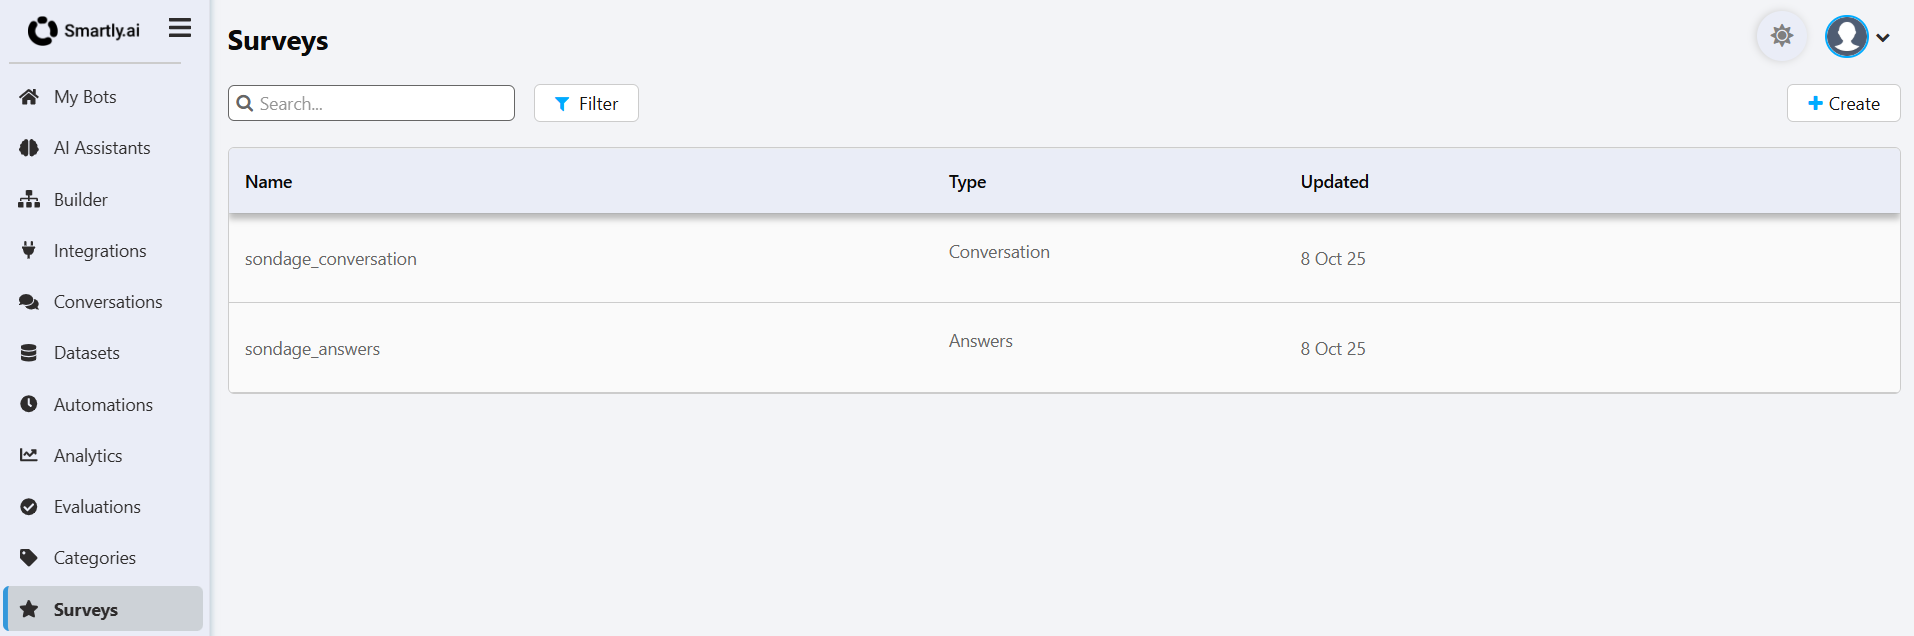
First, find and click on Surveys in the left sidebar.
This will open the Surveys Module where you will be able to manage all your surveys.
Then, select the language you want for your survey and click on Create Survey.
Then, select the ANSWERS type of survey.
Depending on the kind of survey, the available questions will be different.
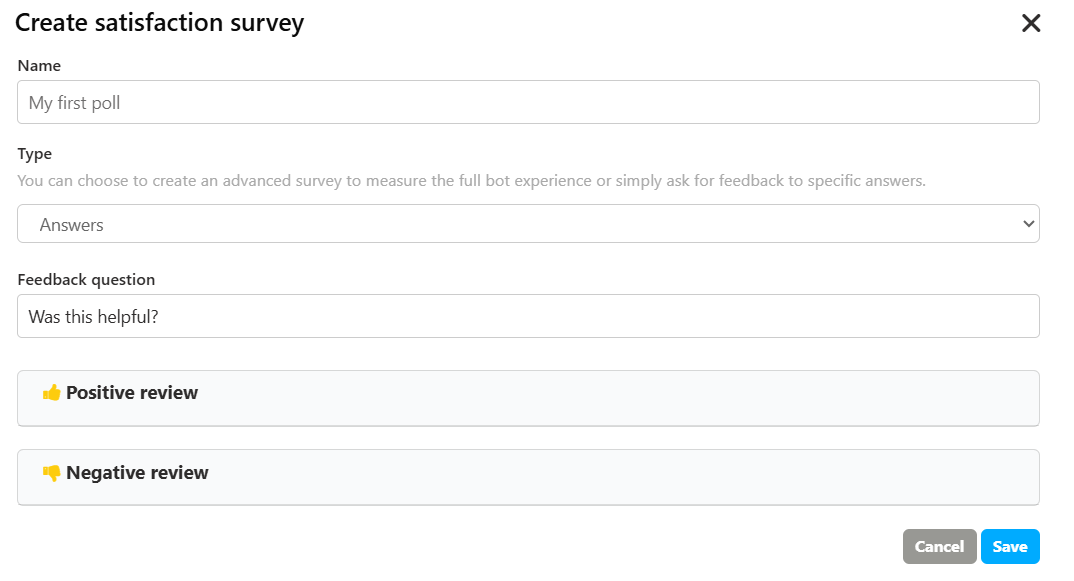
1. General Settings
- Name: A unique internal name for your survey.
- Type: Choose Answers to enable this feedback mode.
- Feedback question: This is the main question that will appear above the thumbs up/down buttons, prompting the user for their opinion (e.g., "Was this helpful?").
2. Customizing Feedback Interactions
You can configure the text and automated reactions for both positive and negative feedback.
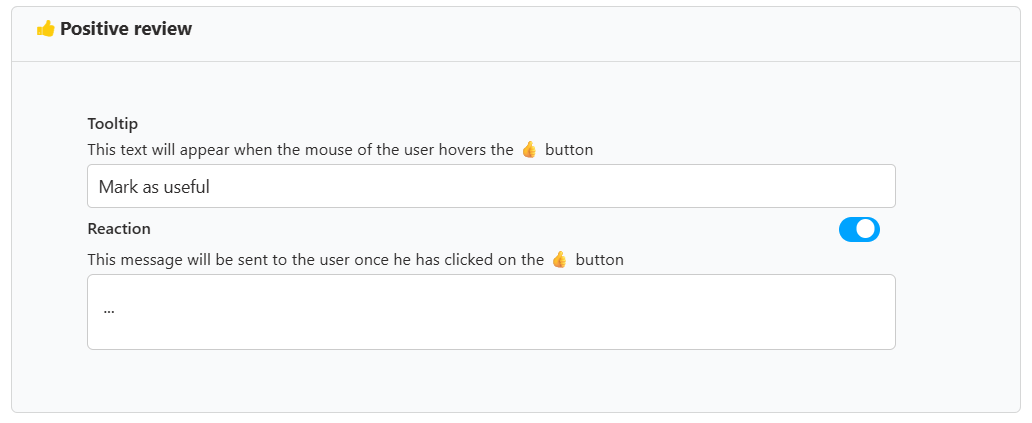
- Tooltip: This text appears when a user hovers their mouse over the "Thumbs Up" button. Use it to clarify the button's action (e.g., "Mark as useful").
- Reaction: If you enable this toggle, you can define an automated message that will be sent to the user immediately after they click the "Thumbs Up" button. This is great for thanking the user (e.g., "Great! I'm glad I could help.").
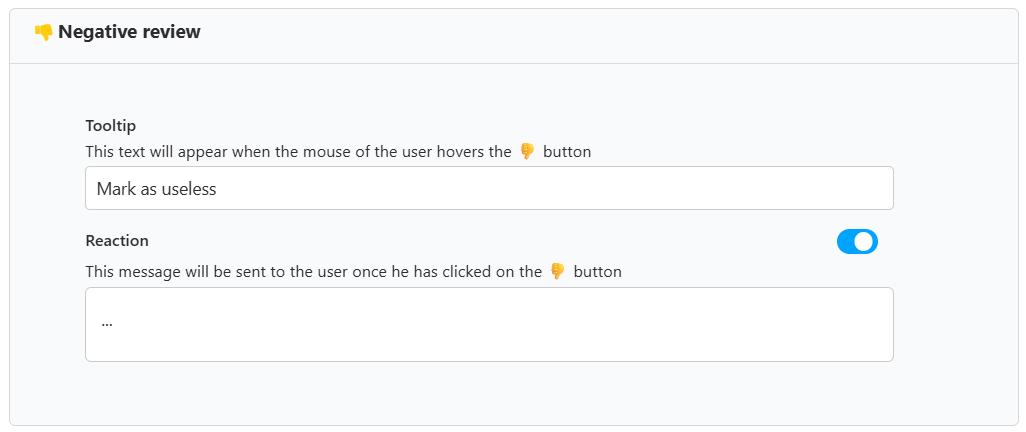
- Tooltip: This is the hover text for the "Thumbs Down" button (e.g., "Mark as useless").
- Reaction: Enable this to send an automated follow-up message after a user gives negative feedback. You can use this to apologize, ask for more details, or offer to connect them with a human agent (e.g., "I'm sorry I couldn't help. I'll forward this to my team to improve.").
After customizing the settings, click Save to activate the survey. It will then be ready to be used in your bot's flows.
You will be able to fine tune the labels shown for the survey question as well as the messages you want to send, as a reaction to a thumbs up or a thumbs down.
Once done, click on the Save button.
The newly created survey will be shown on the survey list, you can create as many surveys as you need for your different bots.
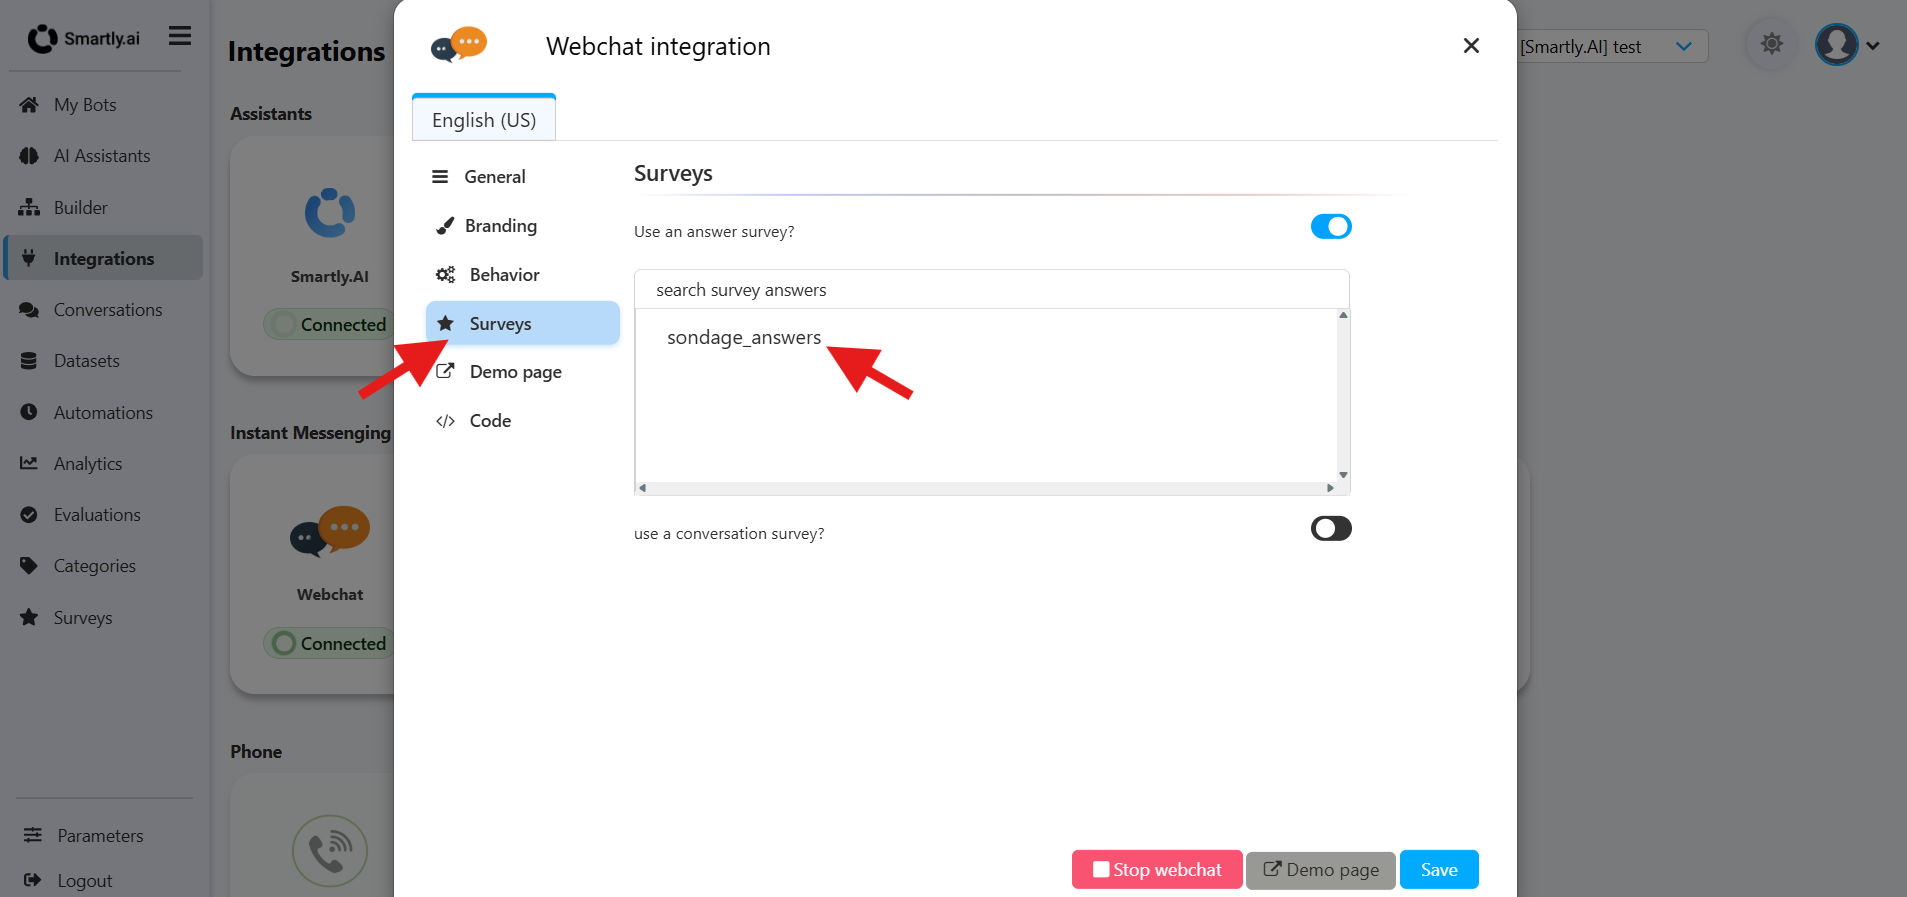
Attaching the survey to your bot
Once the survey created, you will need to attach it to a webchat integration.
To do so, go to the builder and open the webchat integration.
Then click on the Surveys panel
Activate the Conversations Surveys and select the survey you want to use
Triggering the survey manually
From the Builder, in your conversation flow, you can activate the survey answer by clicking on the advanced options of a "Bot Shows"

If you want to activate the survey programmatically, you can do it by adding the following line in your code:
output.show_answer_survey = true;Testing the Survey
Open the webchat and type message is set to trigger a surveyed answer.
You will see a question + two buttons ( 👍 & 👎 )

Depending on what you vote, you will have the bot reaction set in the Answer Survey.
Below are two different reactions sent by the bot for a 👍 and a 👎.

Once you have made a few vote, head on to the Survey Analytics to visualize the survey results.
Can I push a rich message as a reaction to a user vote?
It is possible to push one or several rich messages, to do so copy past the dersired messages in JSON format as shown below.

The syntax of the messages is described here.
Here is a sample you can try to get a text reaction with quick replies.
[
		{
			"quick_replies": [
				{
					"payload": "ok",
					"title": "ok",
					"content_type": "text"
				},
				{
					"payload": "ko",
					"title": "ko",
					"content_type": "text"
				}
			],
			"text": "Text + quick replies"
		}
	]
You will then get the following result

You can do that with any rich message (text, buttons, quick replies, carrousels, images, videos, ...)
Updated 10 months ago