Conversation Surveys
Need to have a feedback on the chatbot experience you are delivering to your customers?
Follow the steps below and you will be good to go!

1 - Creating the survey
First, find and click on Surveys in the left sidebar.
This will open the Surveys Module where you will be able to manage all your surveys.
Then, select the language you want for your survey and click on Create Survey.
This will open the configuration modal.

1. General Configuration
First, you need to define the basic settings for your survey:
- Name: A unique name for your survey for internal reference.
- Type: Choose what you want to evaluate.
Conversation: Measures the overall user experience at the end of the interaction.
Answer: Asks for feedback on a specific answer provided by the bot.
Assistant: Gathers general feedback about the assistant as a whole. - Thank you message: The confirmation message a user will see after successfully submitting their feedback.
2. Feedback Collection Methods
You can combine up to three different methods to collect feedback. You can enable or disable each one using the toggle switch.
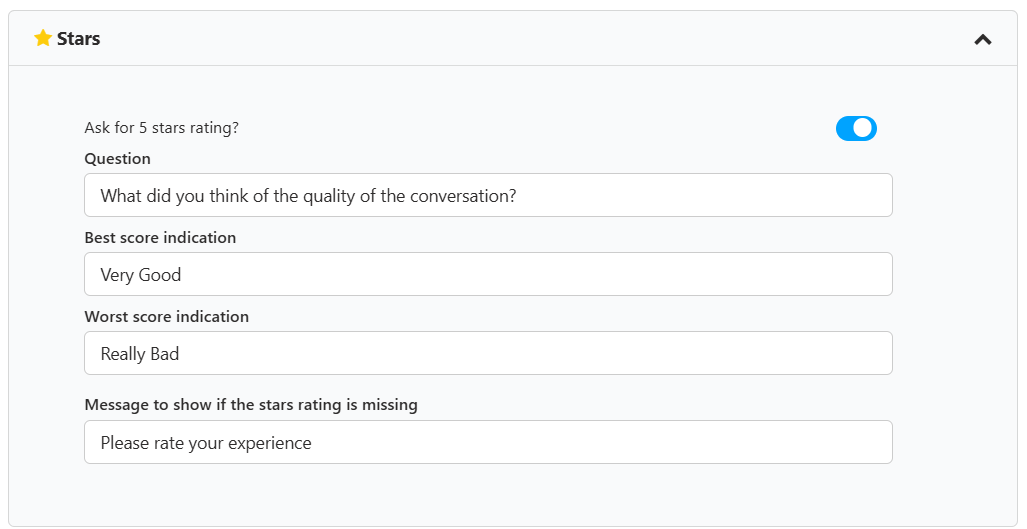
This method allows users to give a rating from 1 to 5 stars.
Ask for 5 stars rating?: Enable or disable this feedback method.
Question: The question that will be asked to the user (e.g., "How would you rate this answer?").
Best score indication: The label that appears for the highest score (5 stars), like "Very Good".
Worst score indication: The label for the lowest score (1 star), like "Really Bad".
Message to show if the stars rating is missing: A follow-up message if the user provides a comment but does not select a star rating.
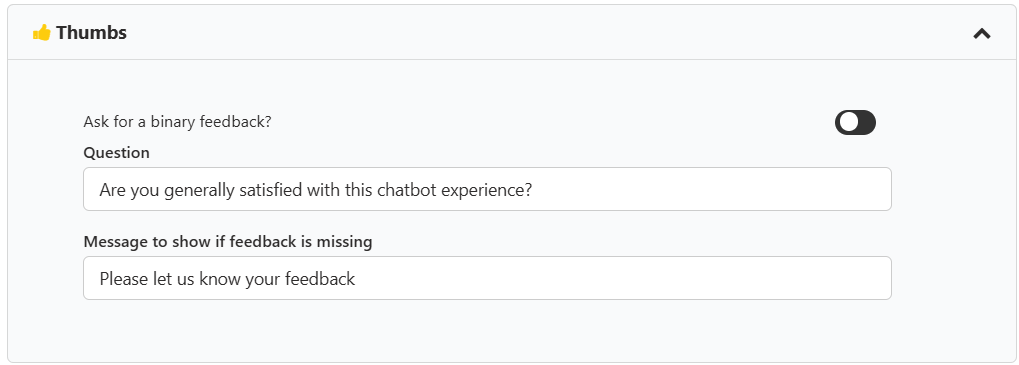
This provides a simple binary feedback option (e.g., Thumbs Up / Thumbs Down).
Ask for a binary feedback?: Enable or disable this feedback method.
Question: The question prompting the user for feedback (e.g., "Was this helpful?").
Message to show if feedback is missing: A follow-up message if the user provides a comment but doesn't select an option.
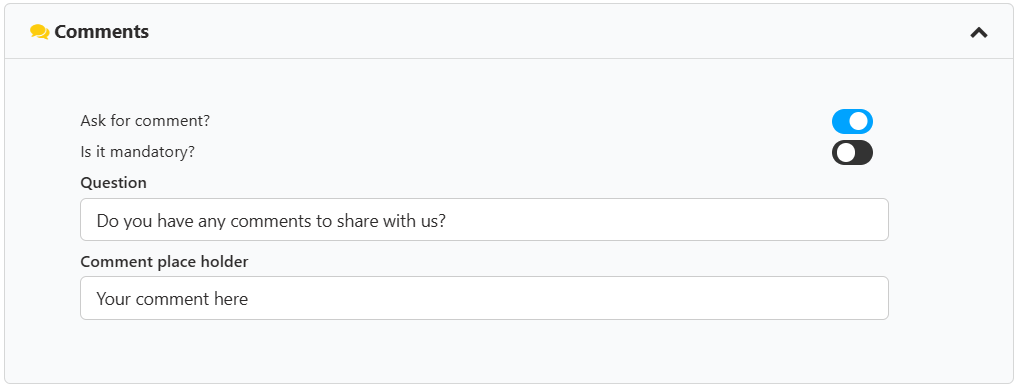
This method allows users to provide open-ended, written feedback.
Ask for comment?: Enable or disable the option for users to leave a comment.
Is it mandatory?: If enabled, the user must write a comment to submit the survey.
Question: The question asking the user for their comments (e.g., "Do you have any other feedback?").
Comment place holder: The placeholder text that appears in the comment input box before the user starts typing.
Attaching the survey to your bot
Before you startRemember that the survey should be attached to the main bot, once done you will be able to use from any of your microbots 💡
Once the survey created, you will need to attach it to a webchat integration.
To do so, go to the builder and open the webchat integration.
Then click on the Surveys panel
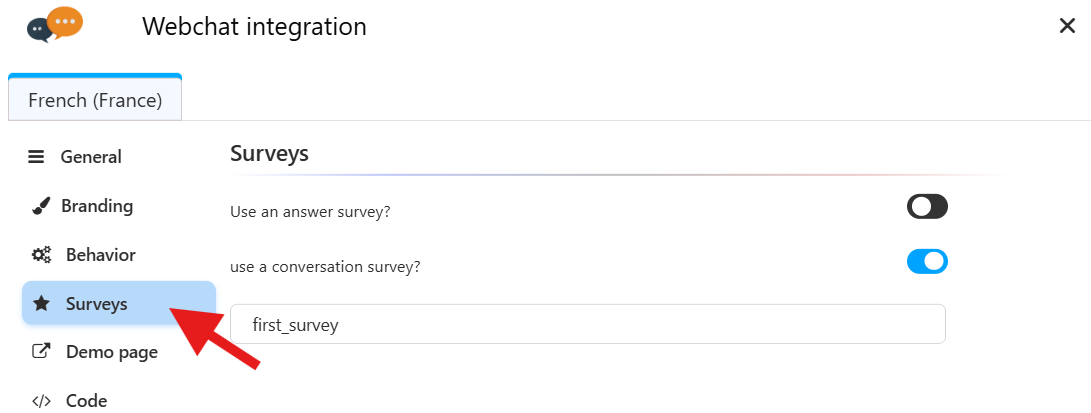
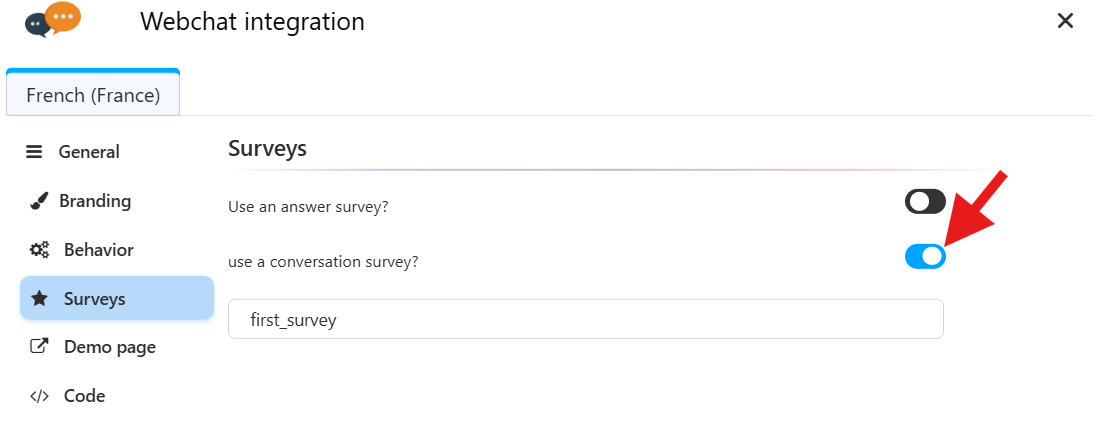
Activate the Conversations Surveys and select the survey you want to use
Once done, click Save. Congratulations, you have attached a Conversation Survey to your bot.
Triggering the survey when the user leaves the conversation
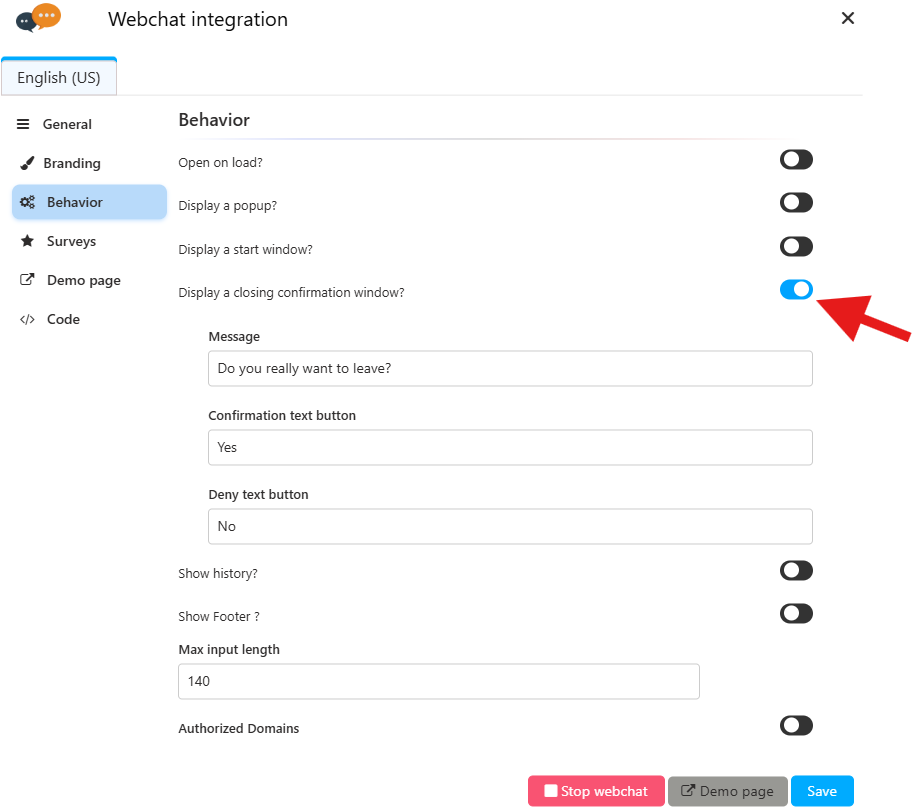
You can force the webchat to show the Conversation Survey each time the user wants to close the conversation.
To do so, follow these steps in the Webchat integration:
- open the
Behaviourspanel - activate the
Display a closing confirmation window?option. Review and customize the labels and click Save.
Now, each time the user will leave the conversation, he will be prompted with the conversation survey like shown below:

Triggering the survey manually at some specific point of the conversation
As we have seen above, the survey will be shown everytime the user will try to close the chat box.
In case you want to send the You have two solutions:
1/ Simple solution
From the Builder, in your conversation flow:
- Add and connect a
Bot Showsblock to the state where you want to send the survey. - Click on Show more options.
- Toggle the Send Conversation Survey
That's it.

2/ Programmatic solution
From the Builder, in your conversation flow, add and connect a Bot Does block to the state where you want to send the survey. Then add the following line.
output.show_conversation_survey=true;Testing your Survey
Once the setting is done, close the webchat, make a few votes and head on to the Survey Analytics to check the first results!